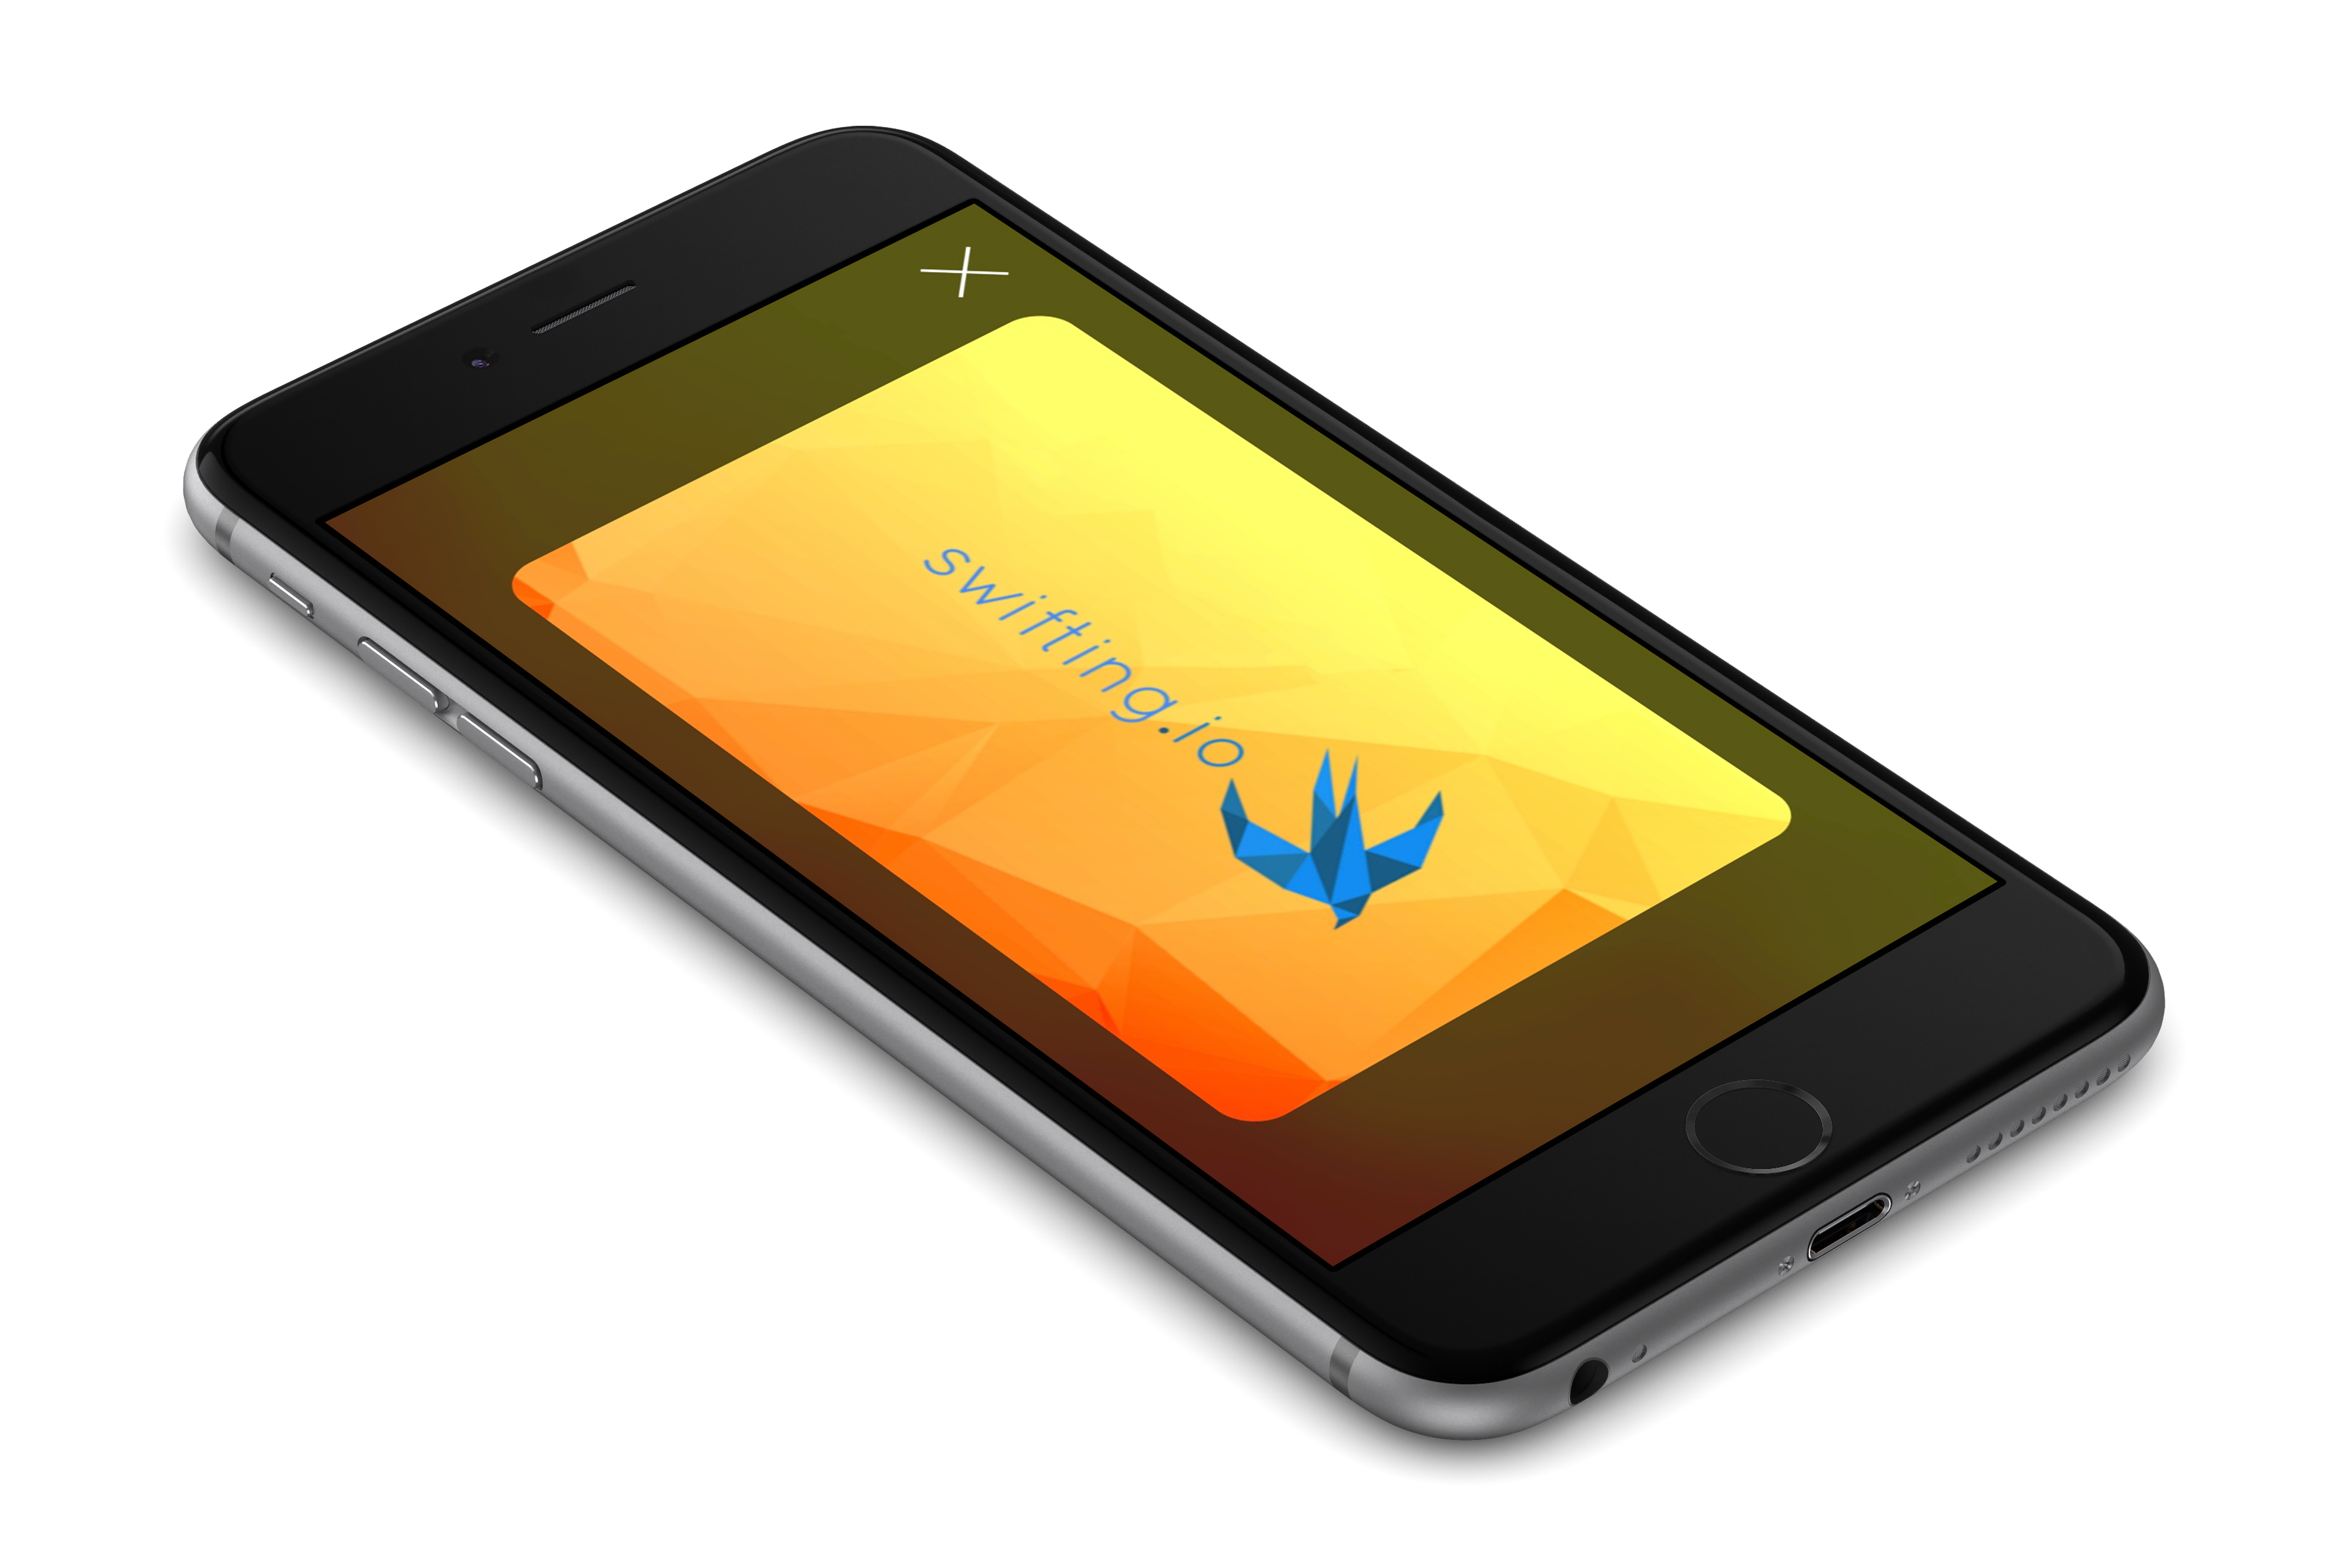
#41 Architecture Wars – MVC strikes back & takes a photo with AVFoundation
Not so long ago, in a galaxy not so far away… we promised you a series about architectural patterns. This post is a follow up for our initial issue on the topic. And finally, we can share with you the My Cards application written in MVC …

The main idea behind this app is to refactor its code to fit MVVM, VIPER and VIP architectures. But first, let’s dive into app functionalities.
My Cards
The app is intended for storing photos of loyalty cards. No one wants carrying tons of plastic in their wallets, so taking a photo of a card and showing it to a shop assistant might be useful for potential users. Of course, there are such solutions on the market, but we wanted to build something more fancy than a simple to-do list (as probably majority of examples show).
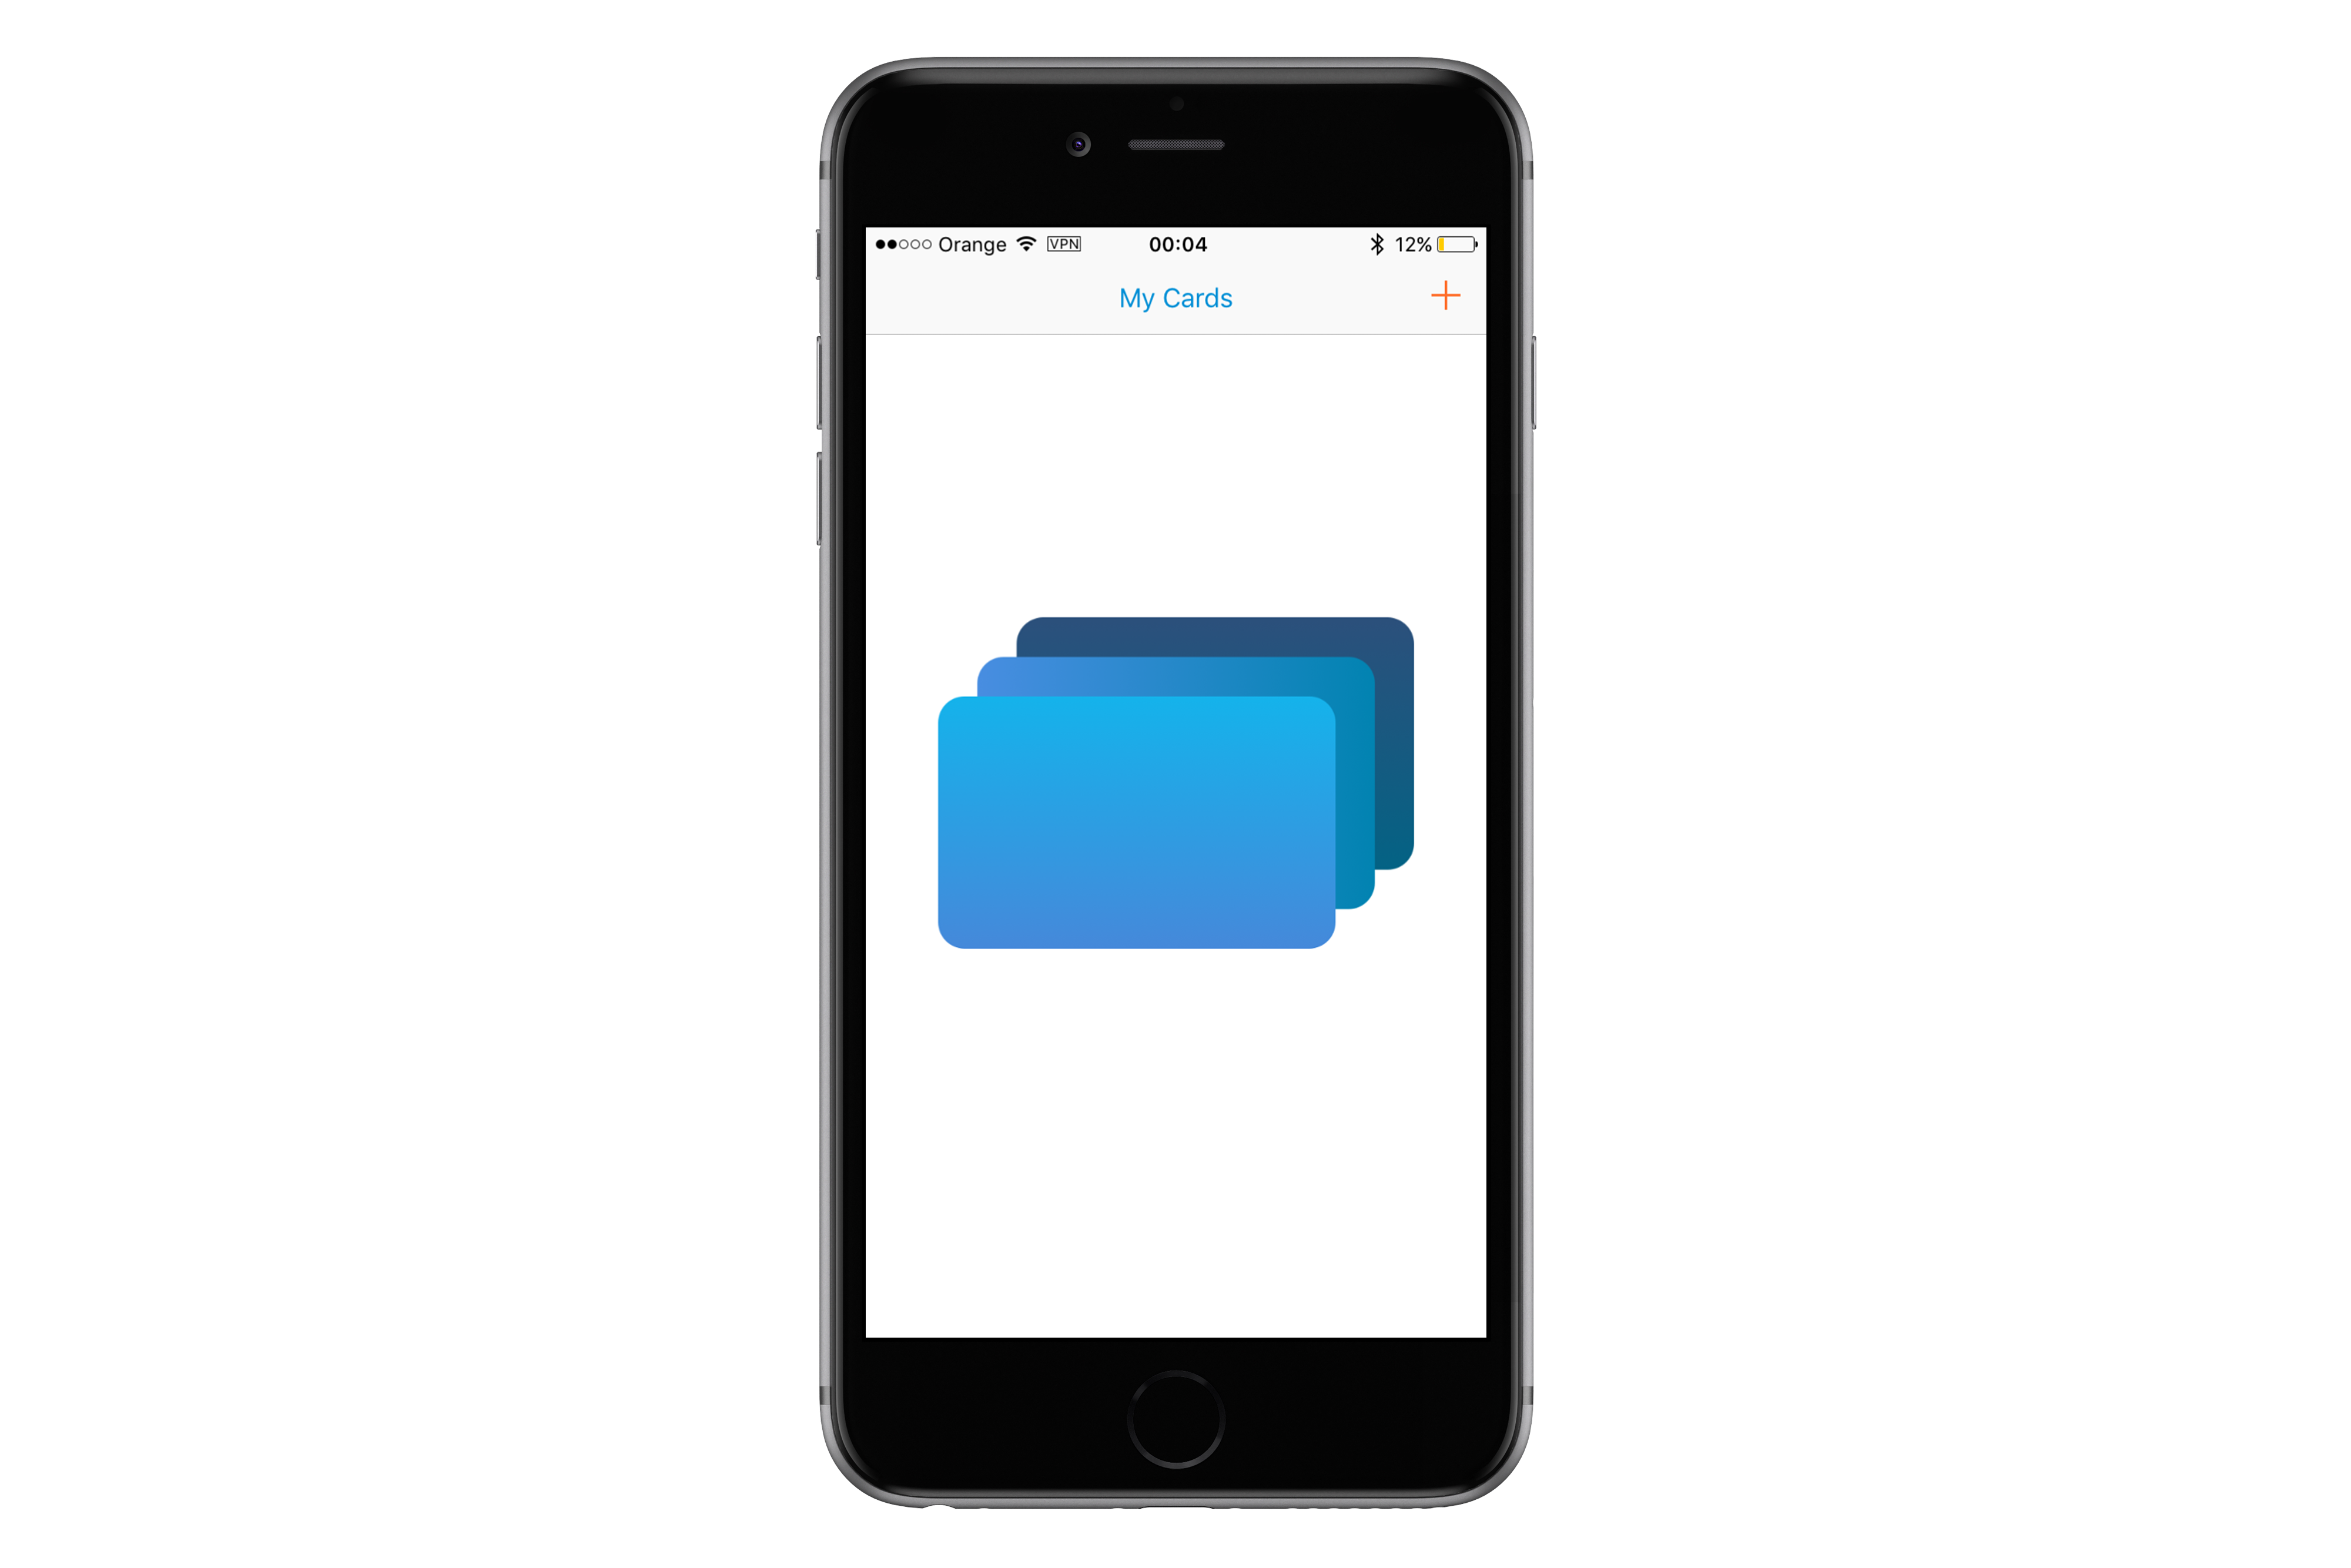
User begins with an empty list. In the meantime application tries to download cards from a backend (mocked in our example). If it succeeds a card will be displayed on the list.
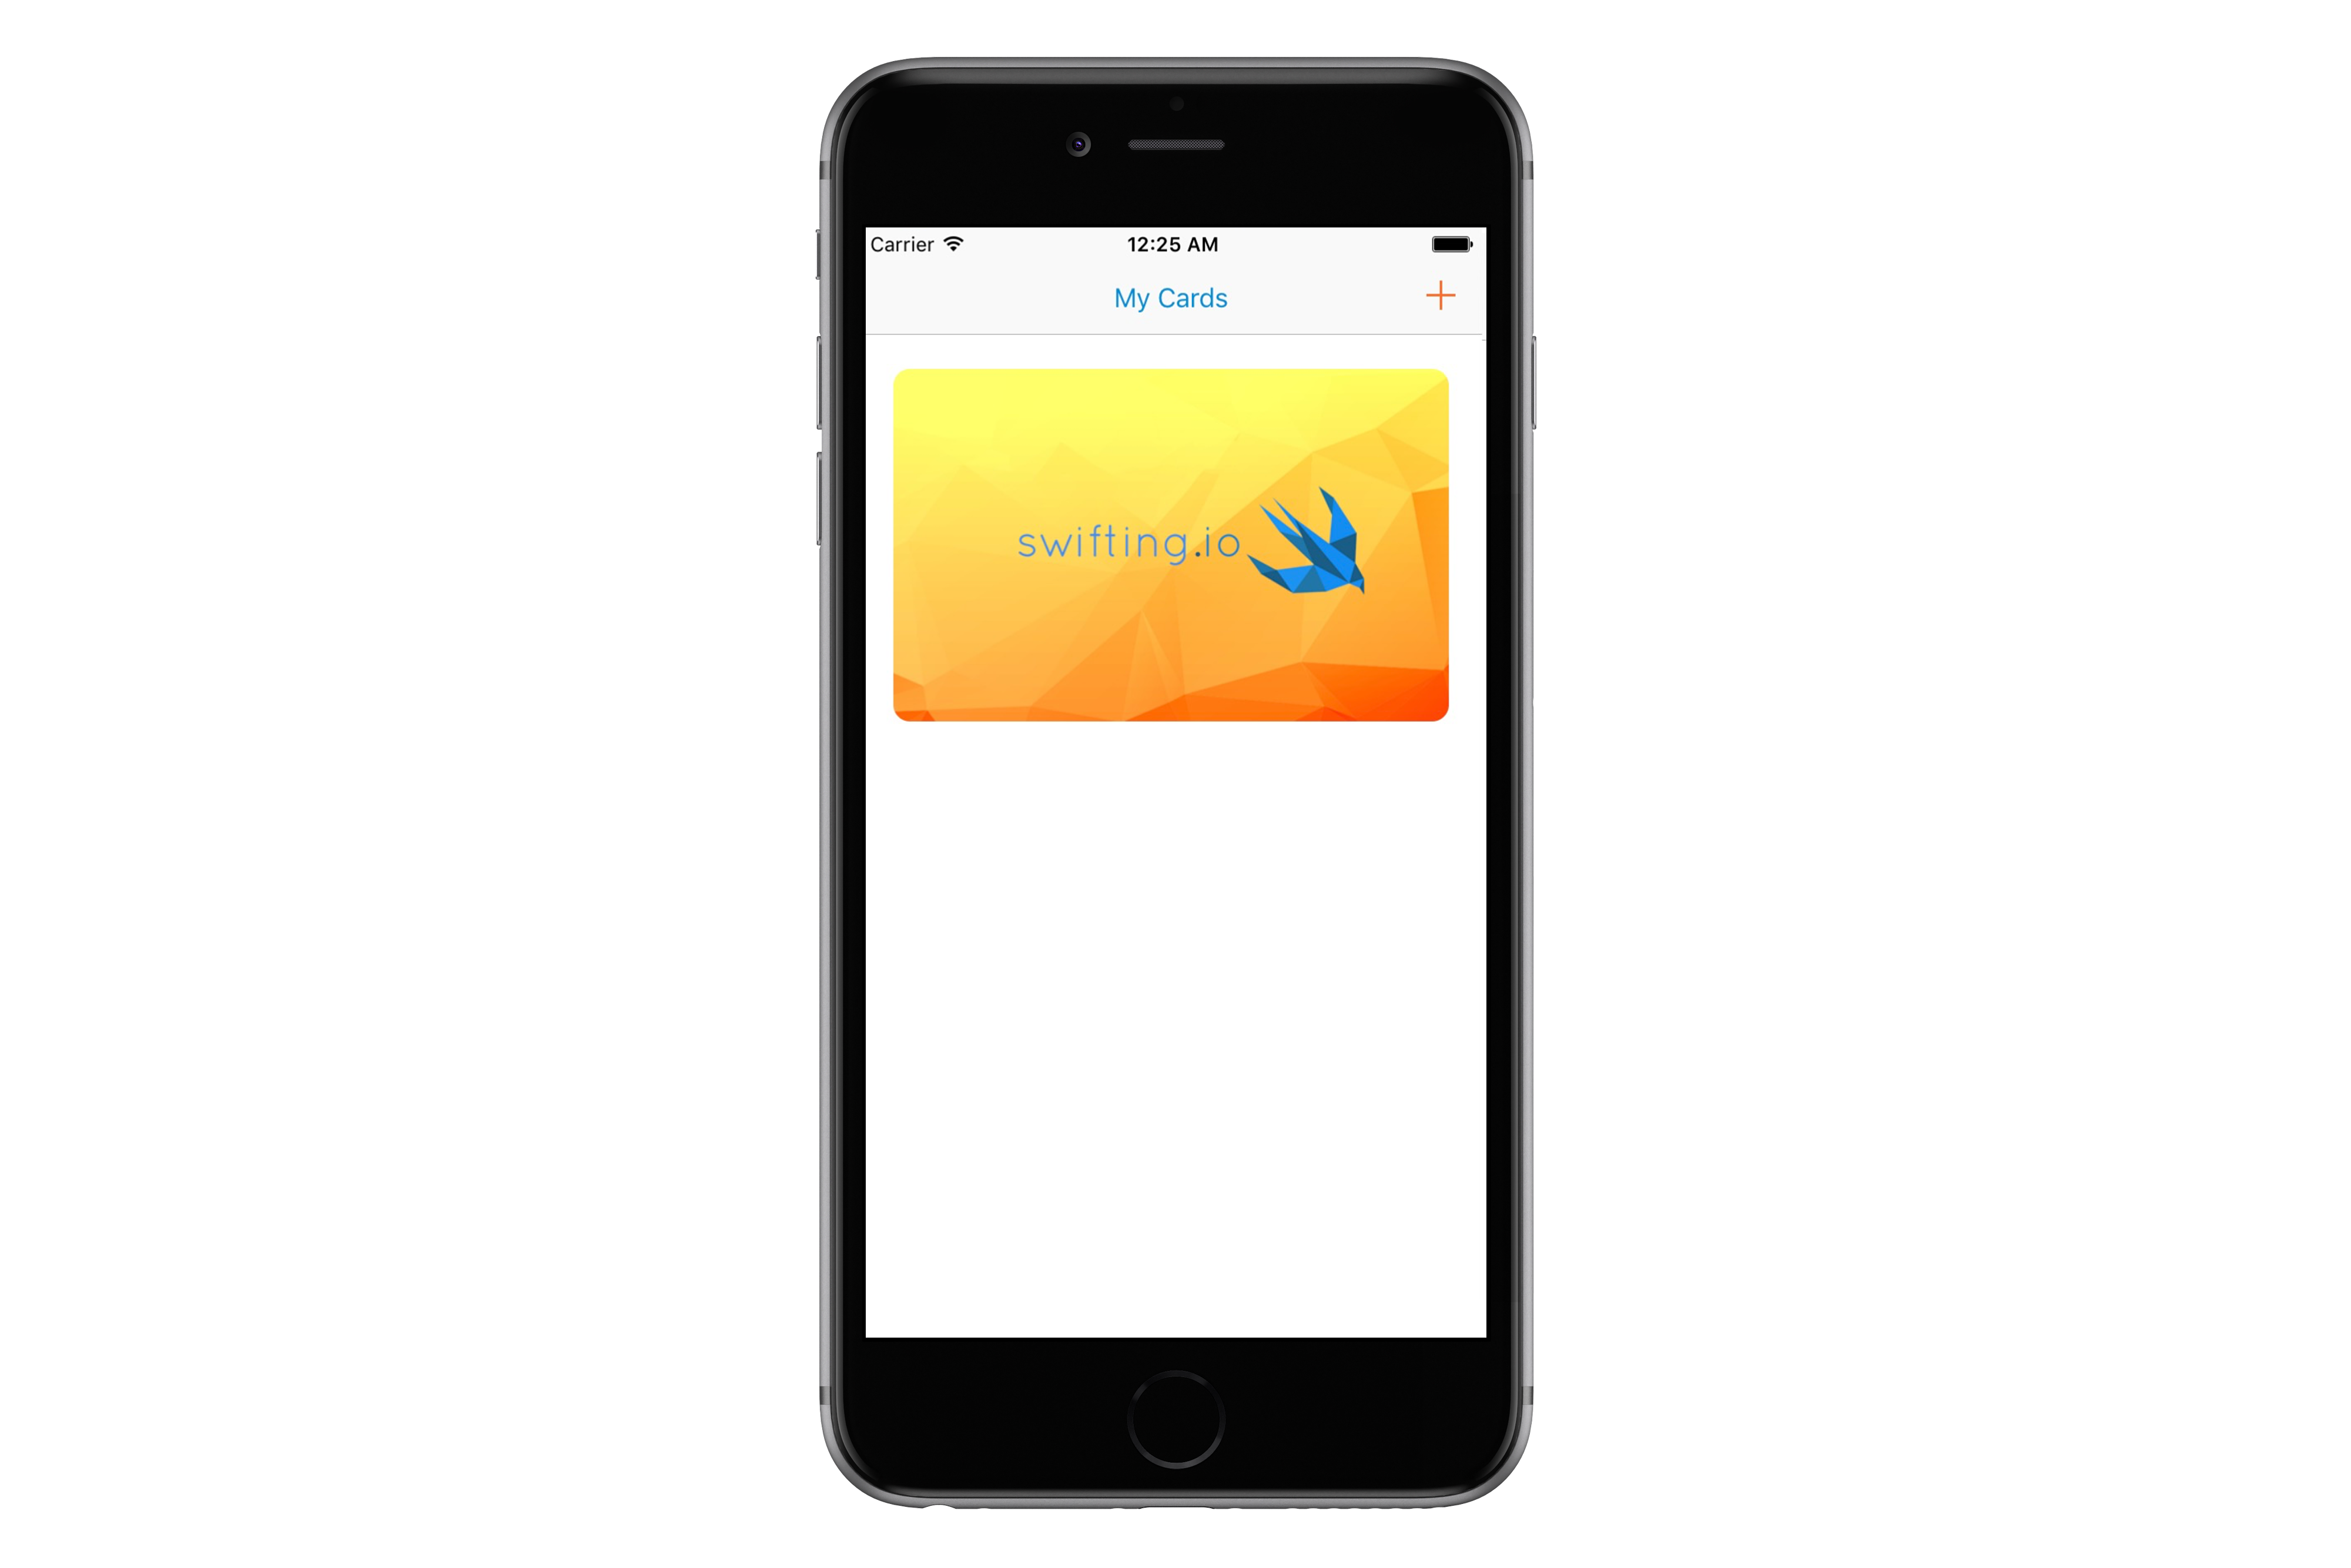
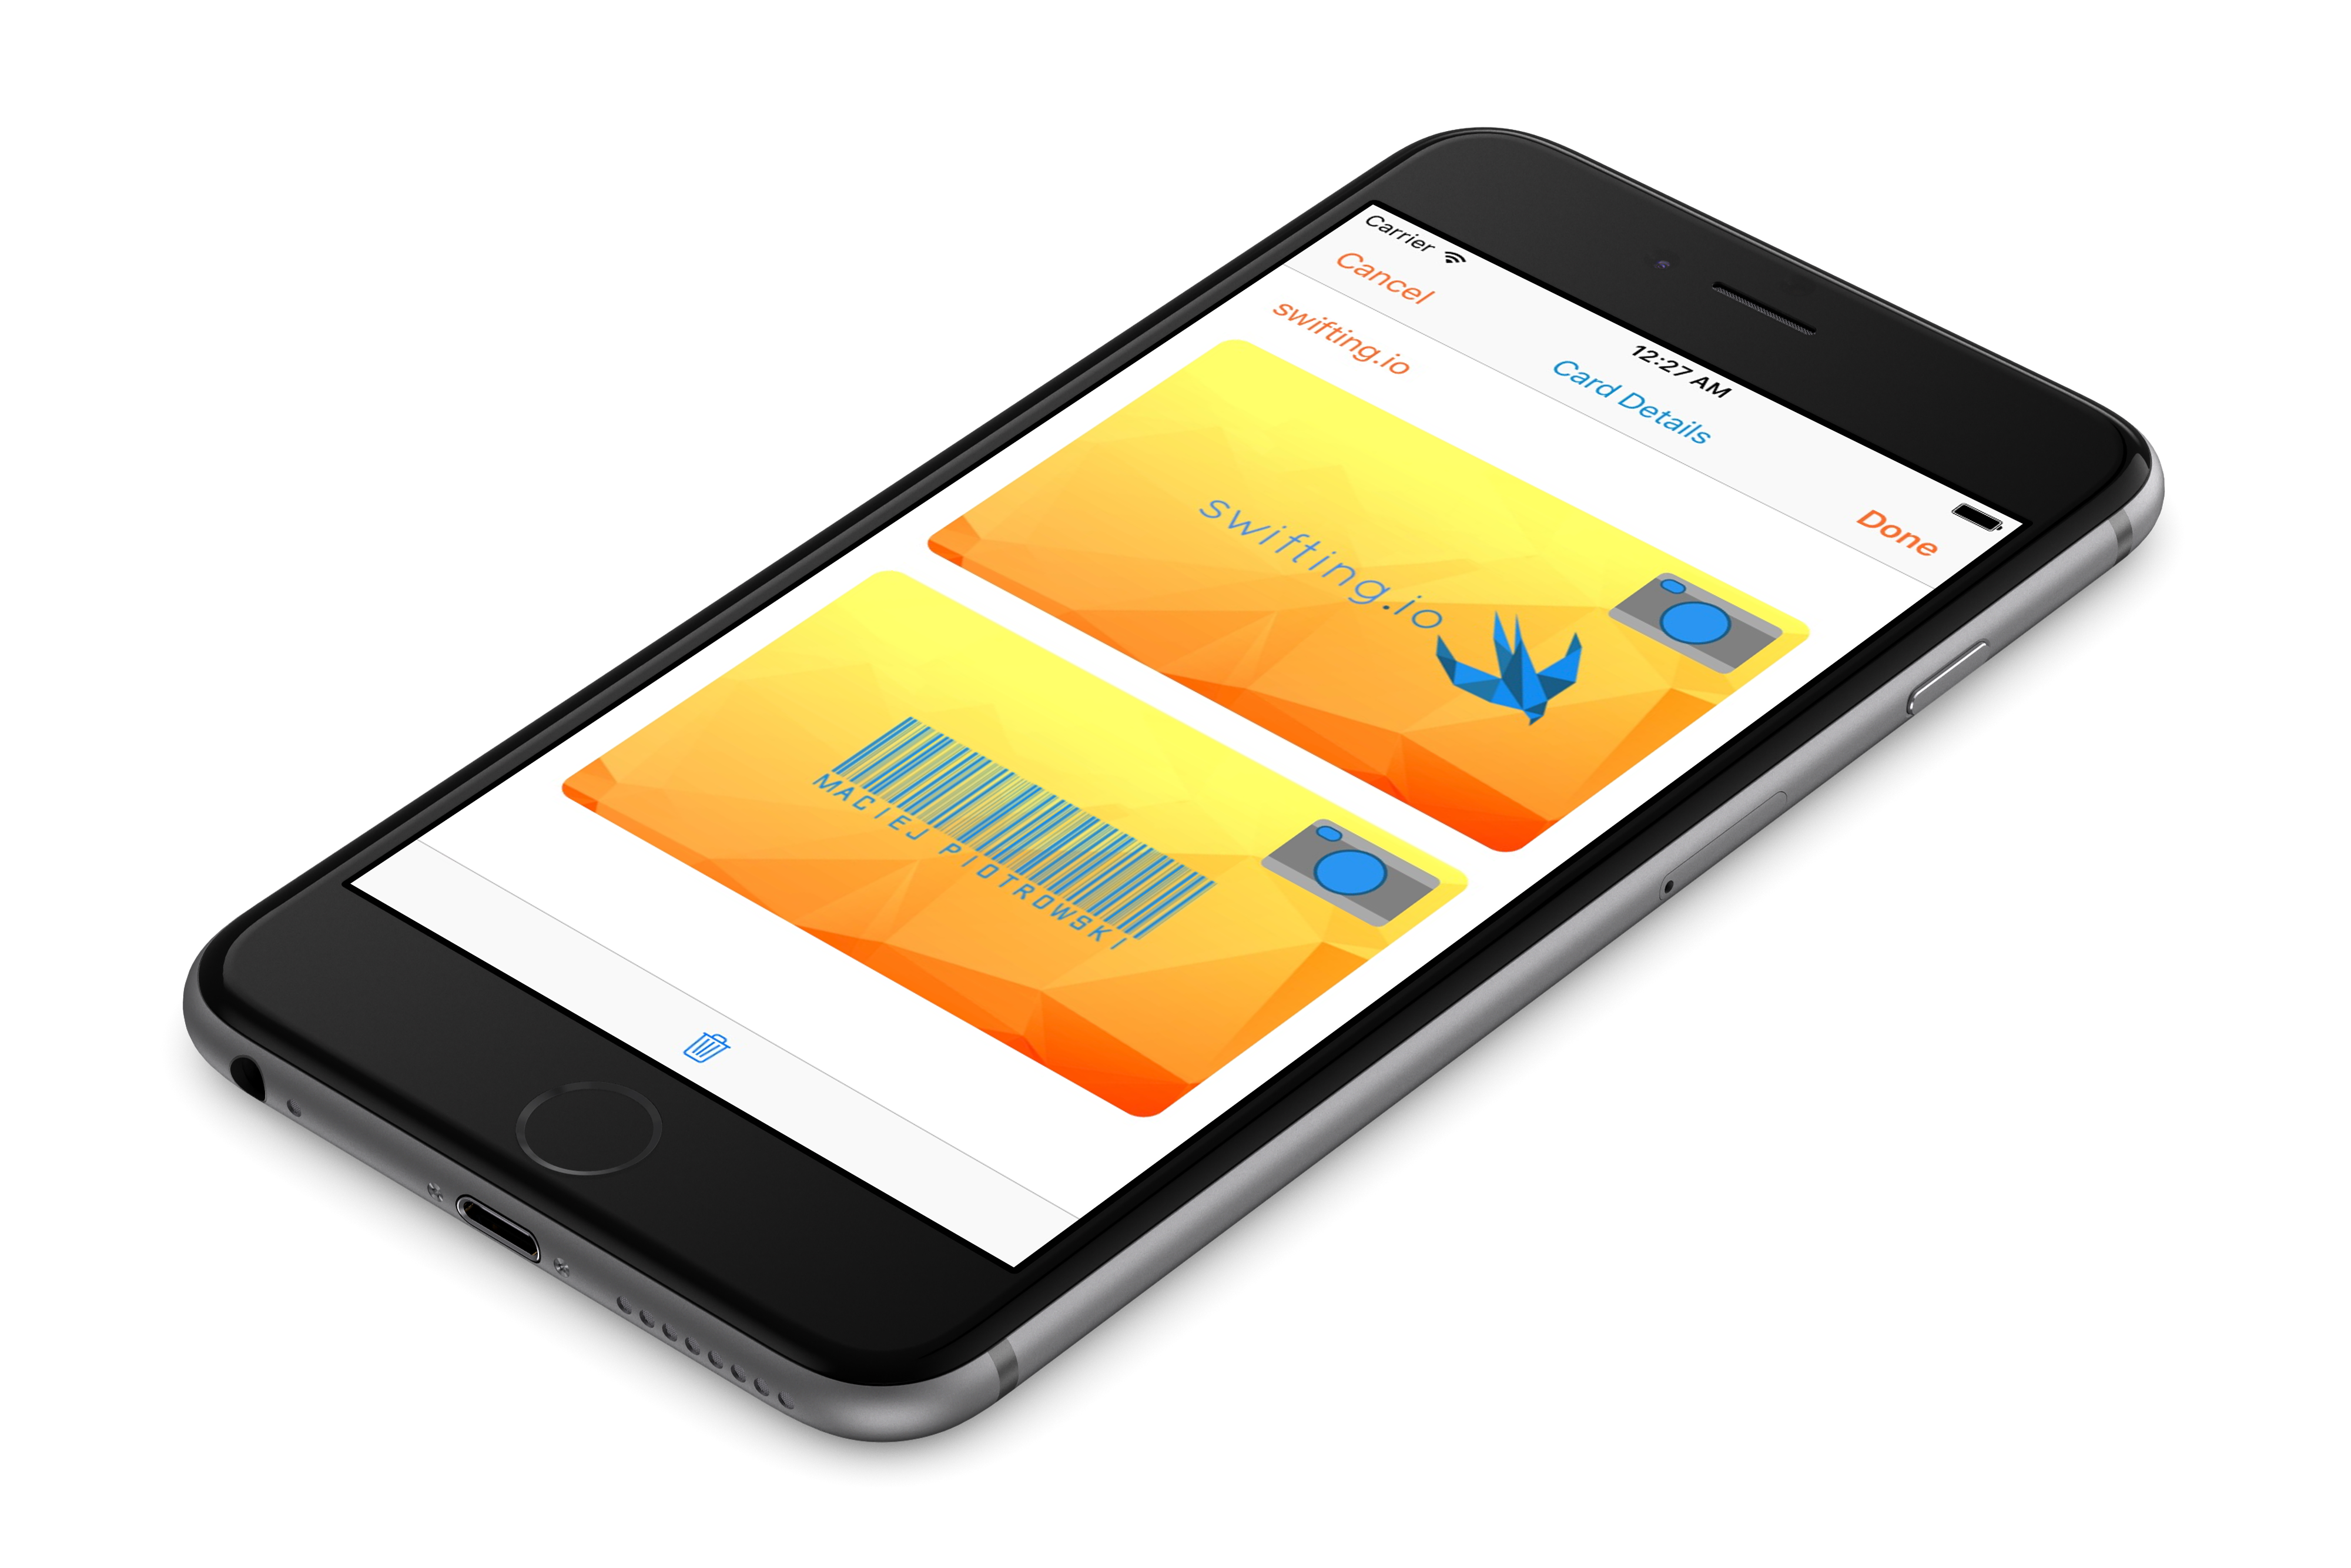
By tapping on a card, its details are shown - a card name, a front and a back photos.
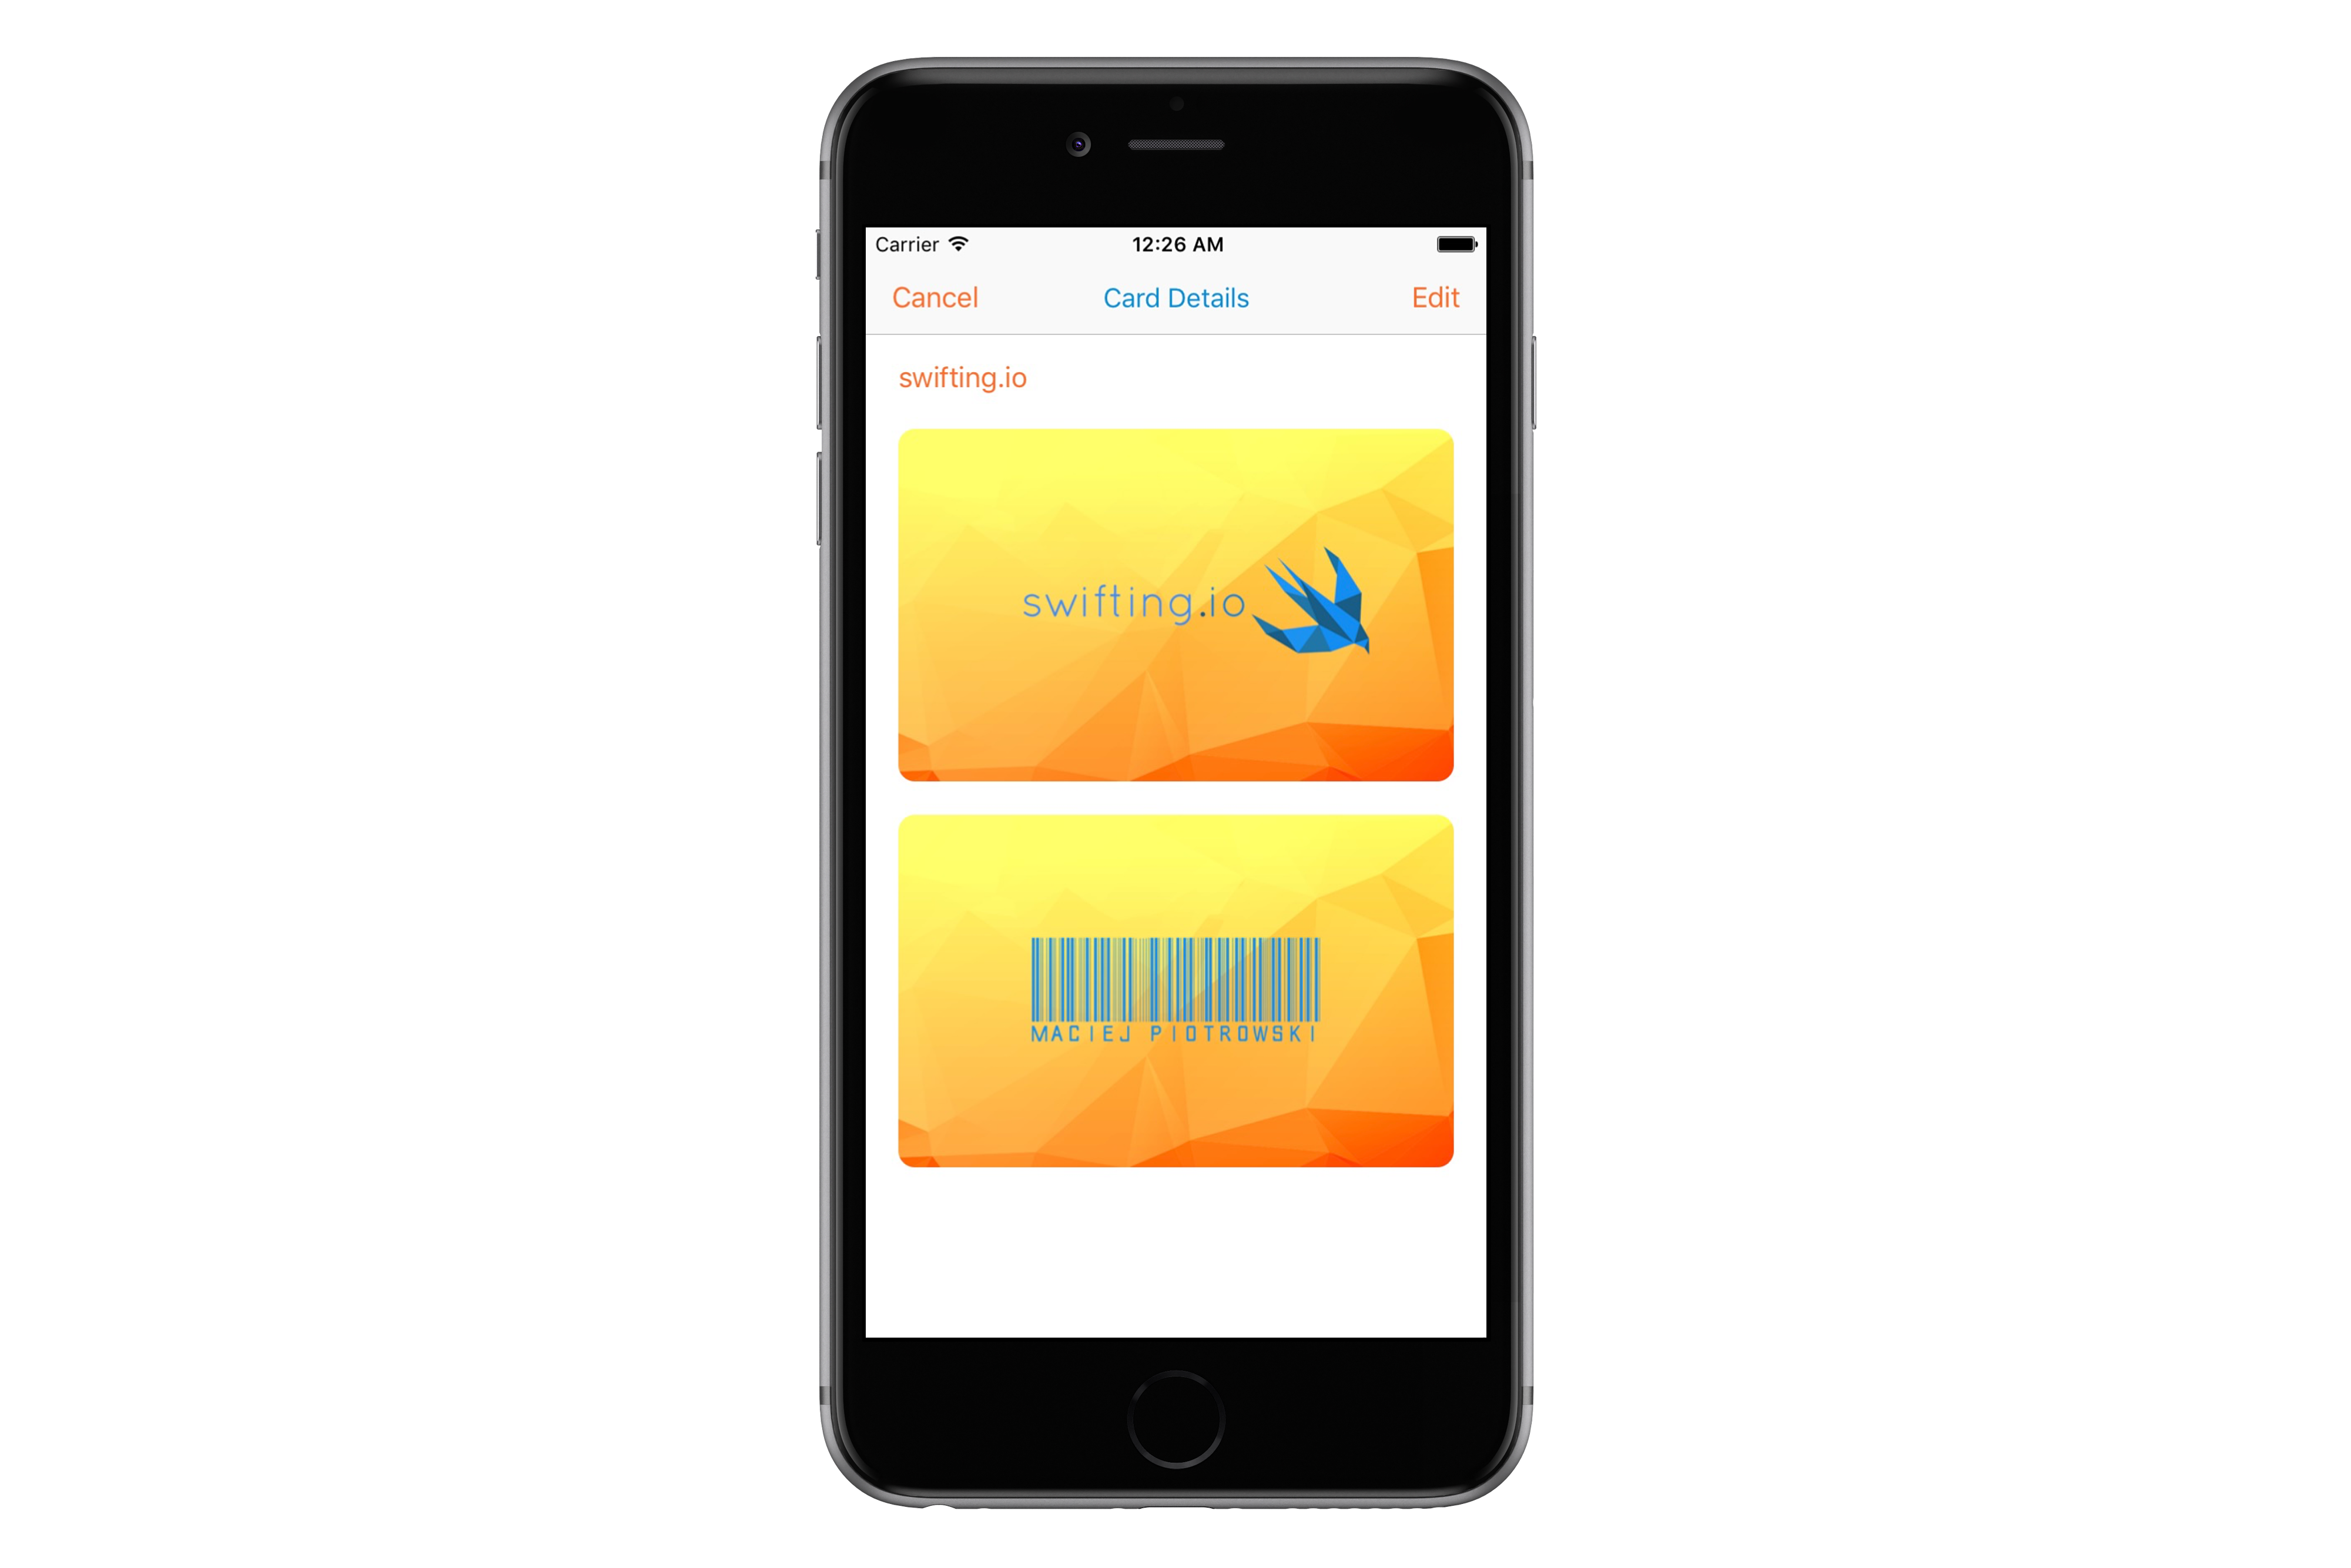
Those can be edited by taping on an Edit button. Person can change photos, name or delete the card entirely.
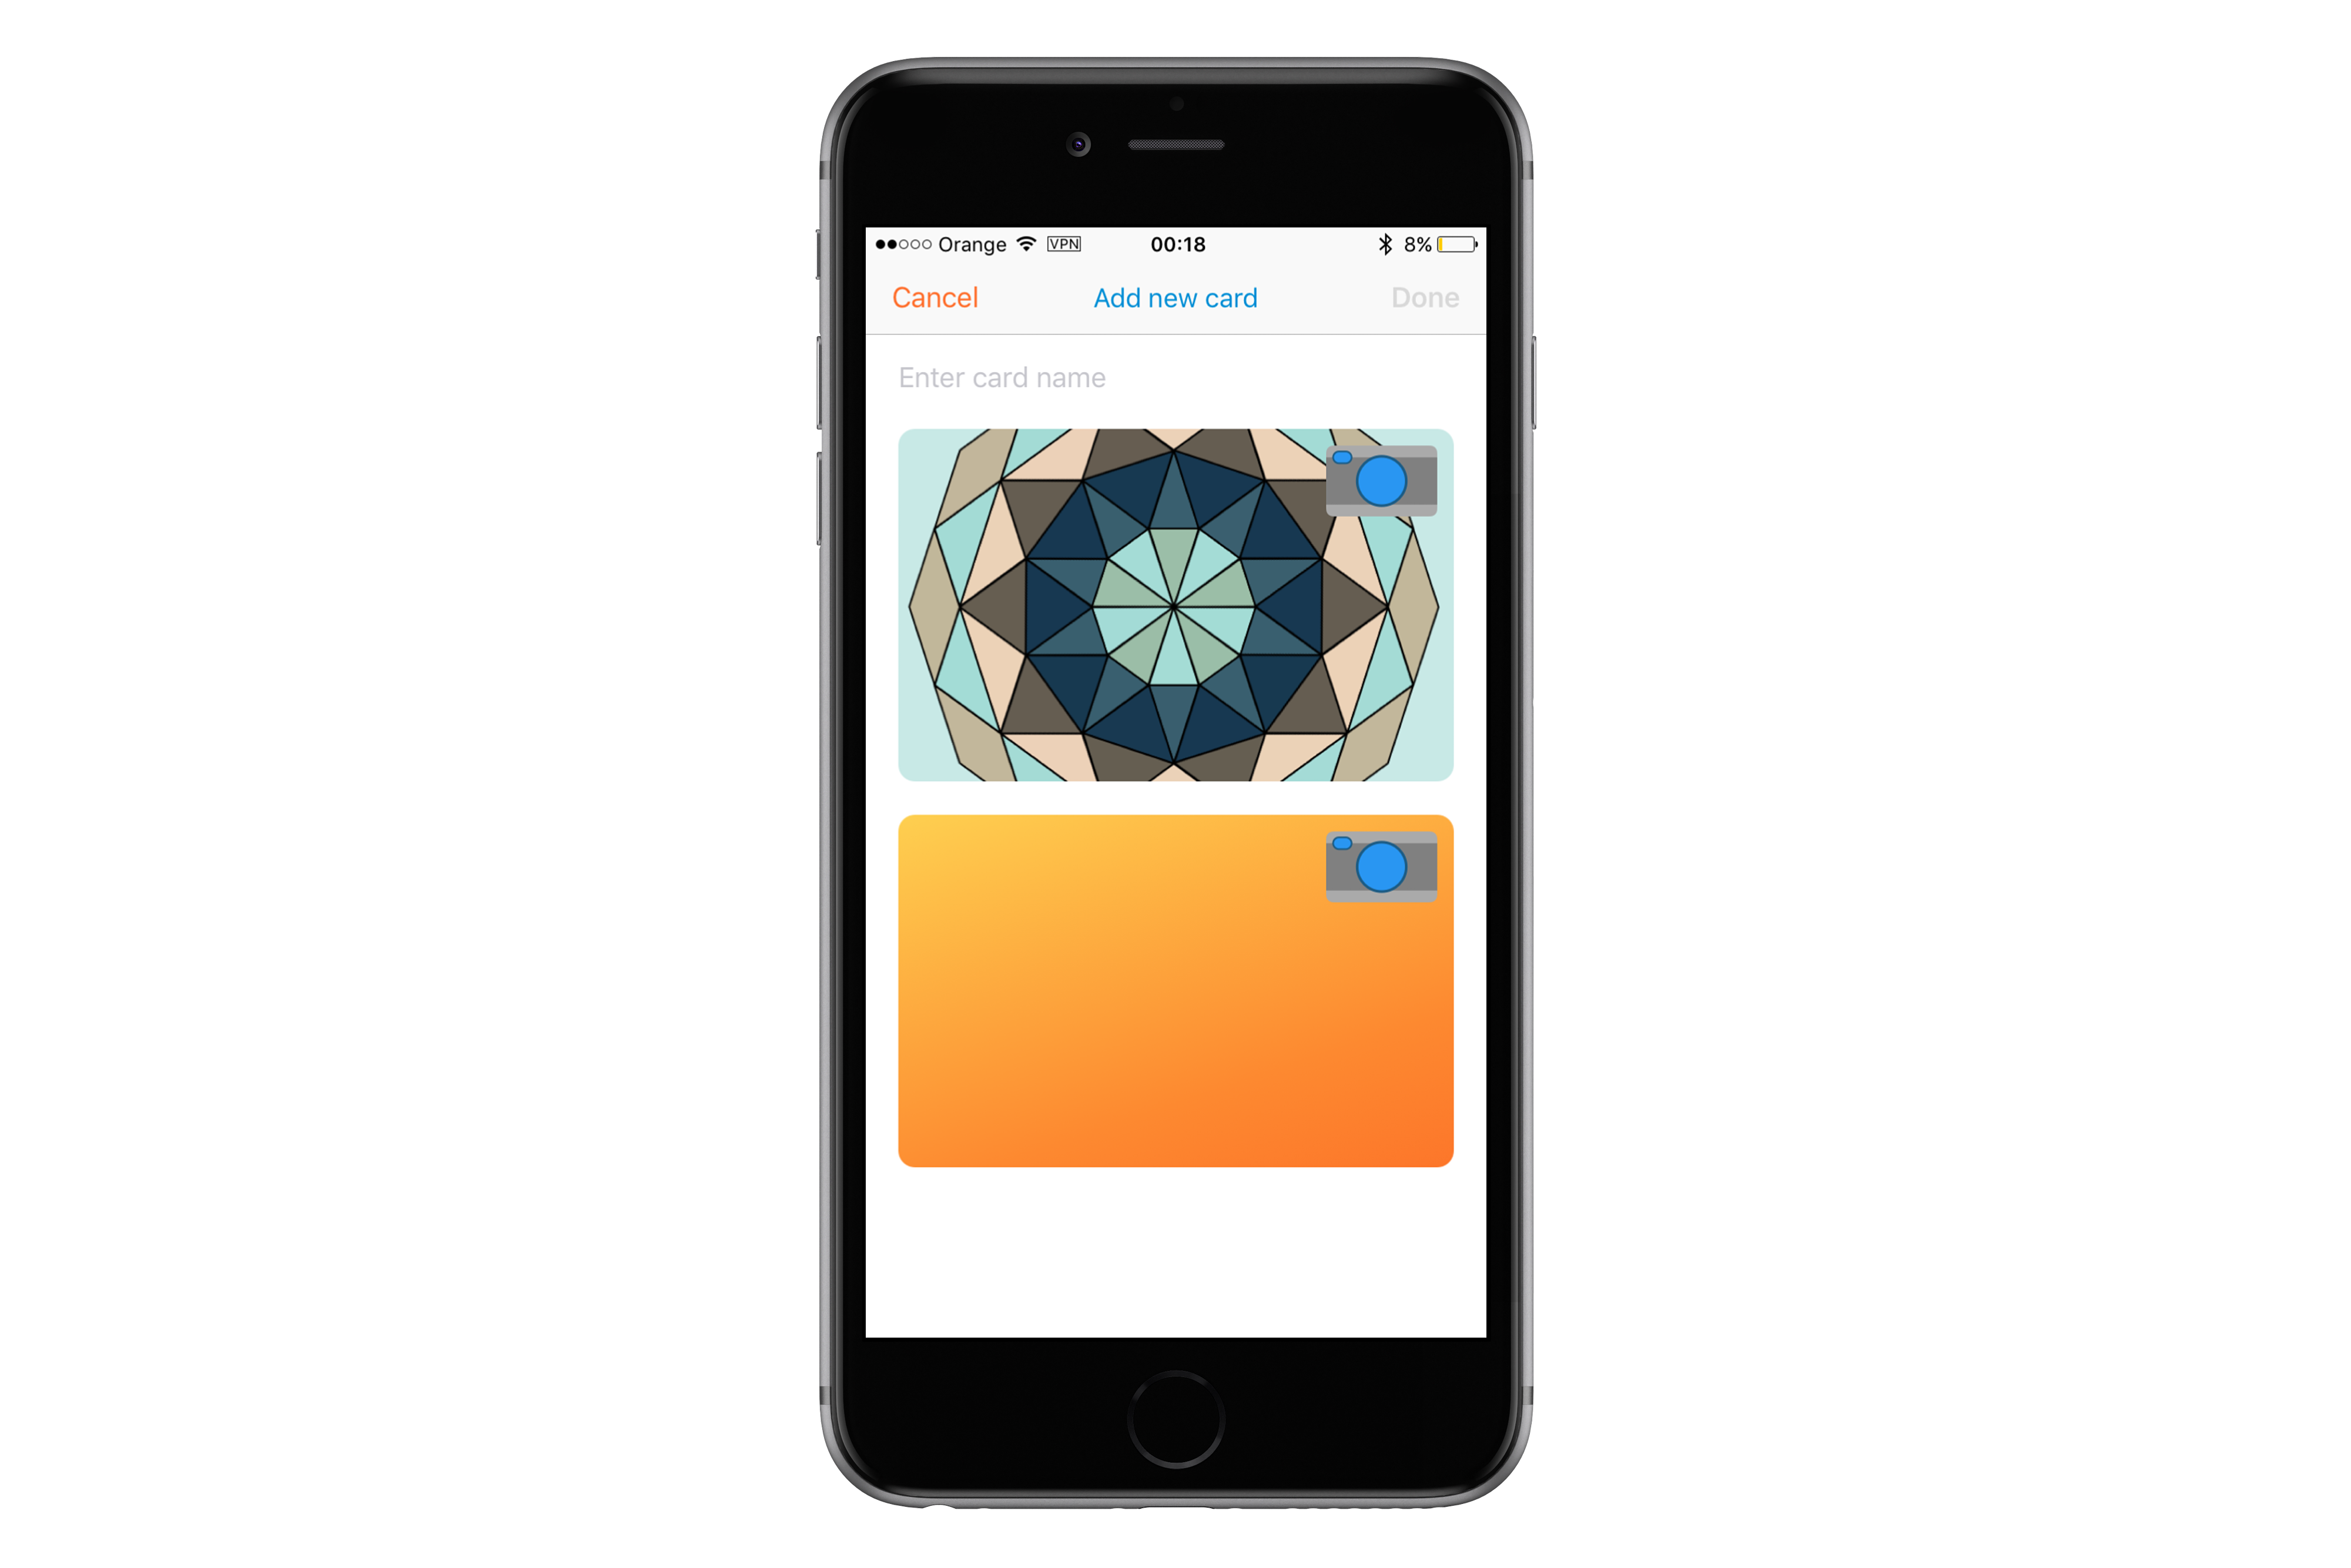
From the list of cards one can add a new one. New name and photos need to be selected.
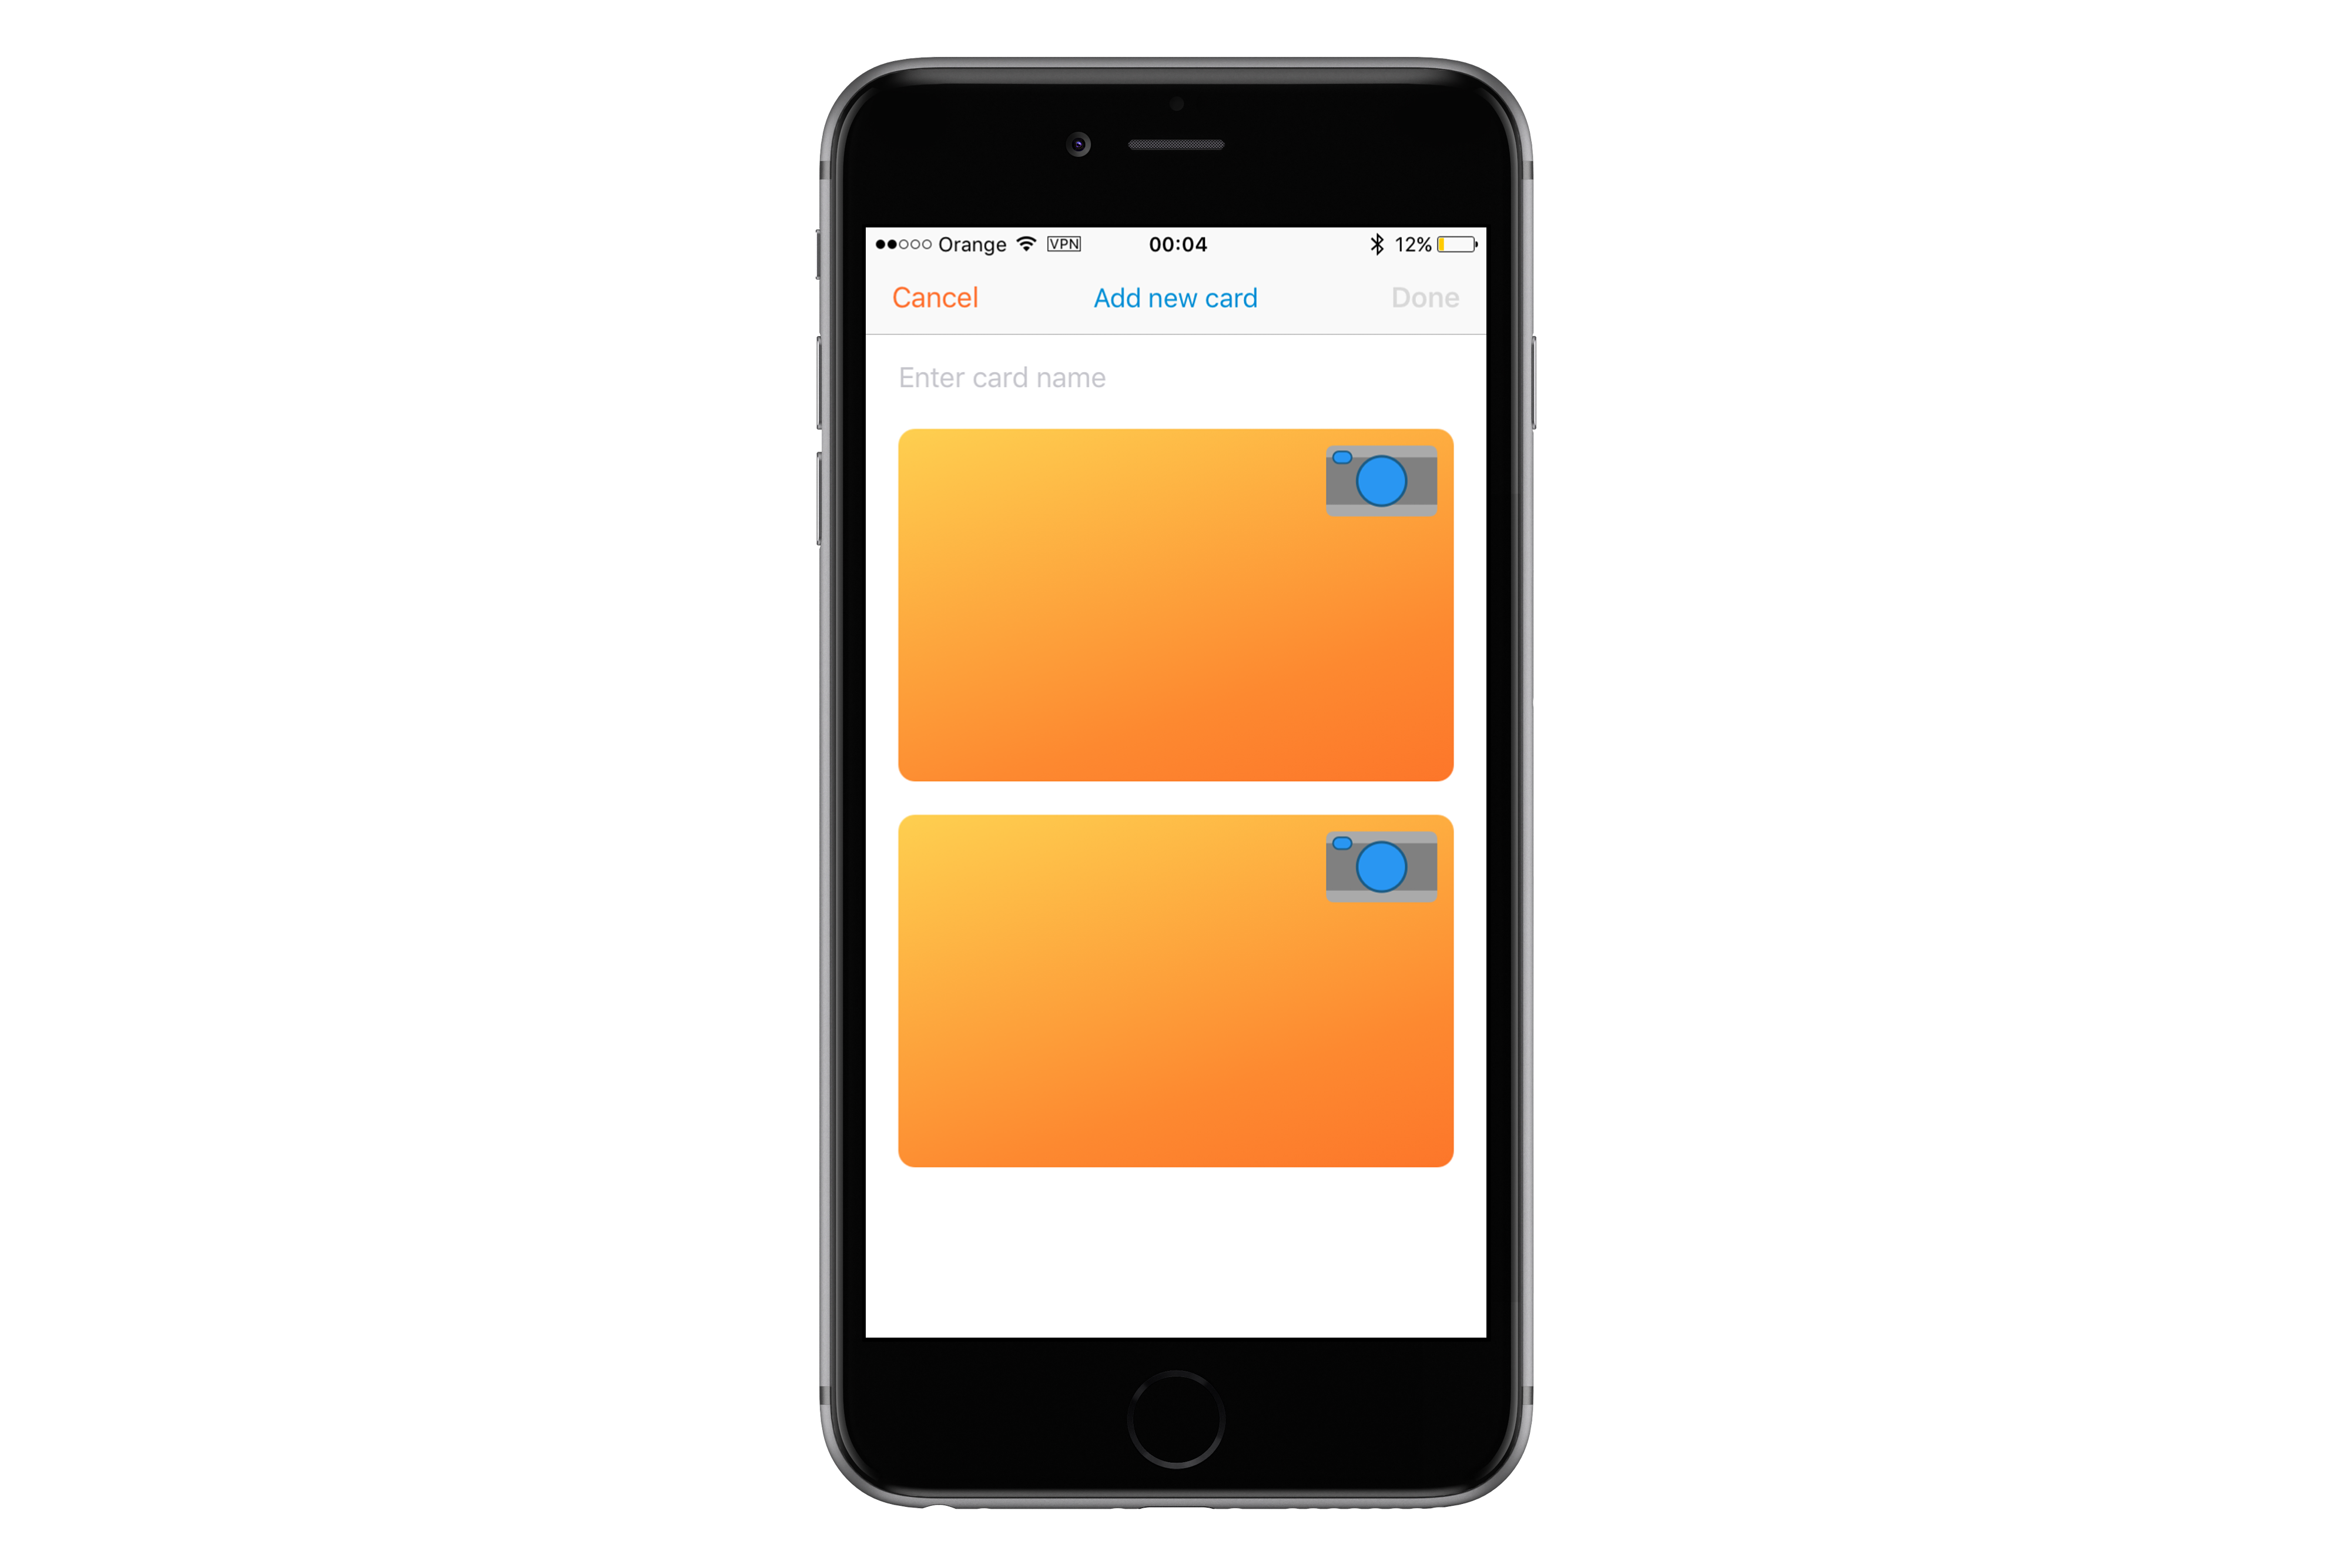
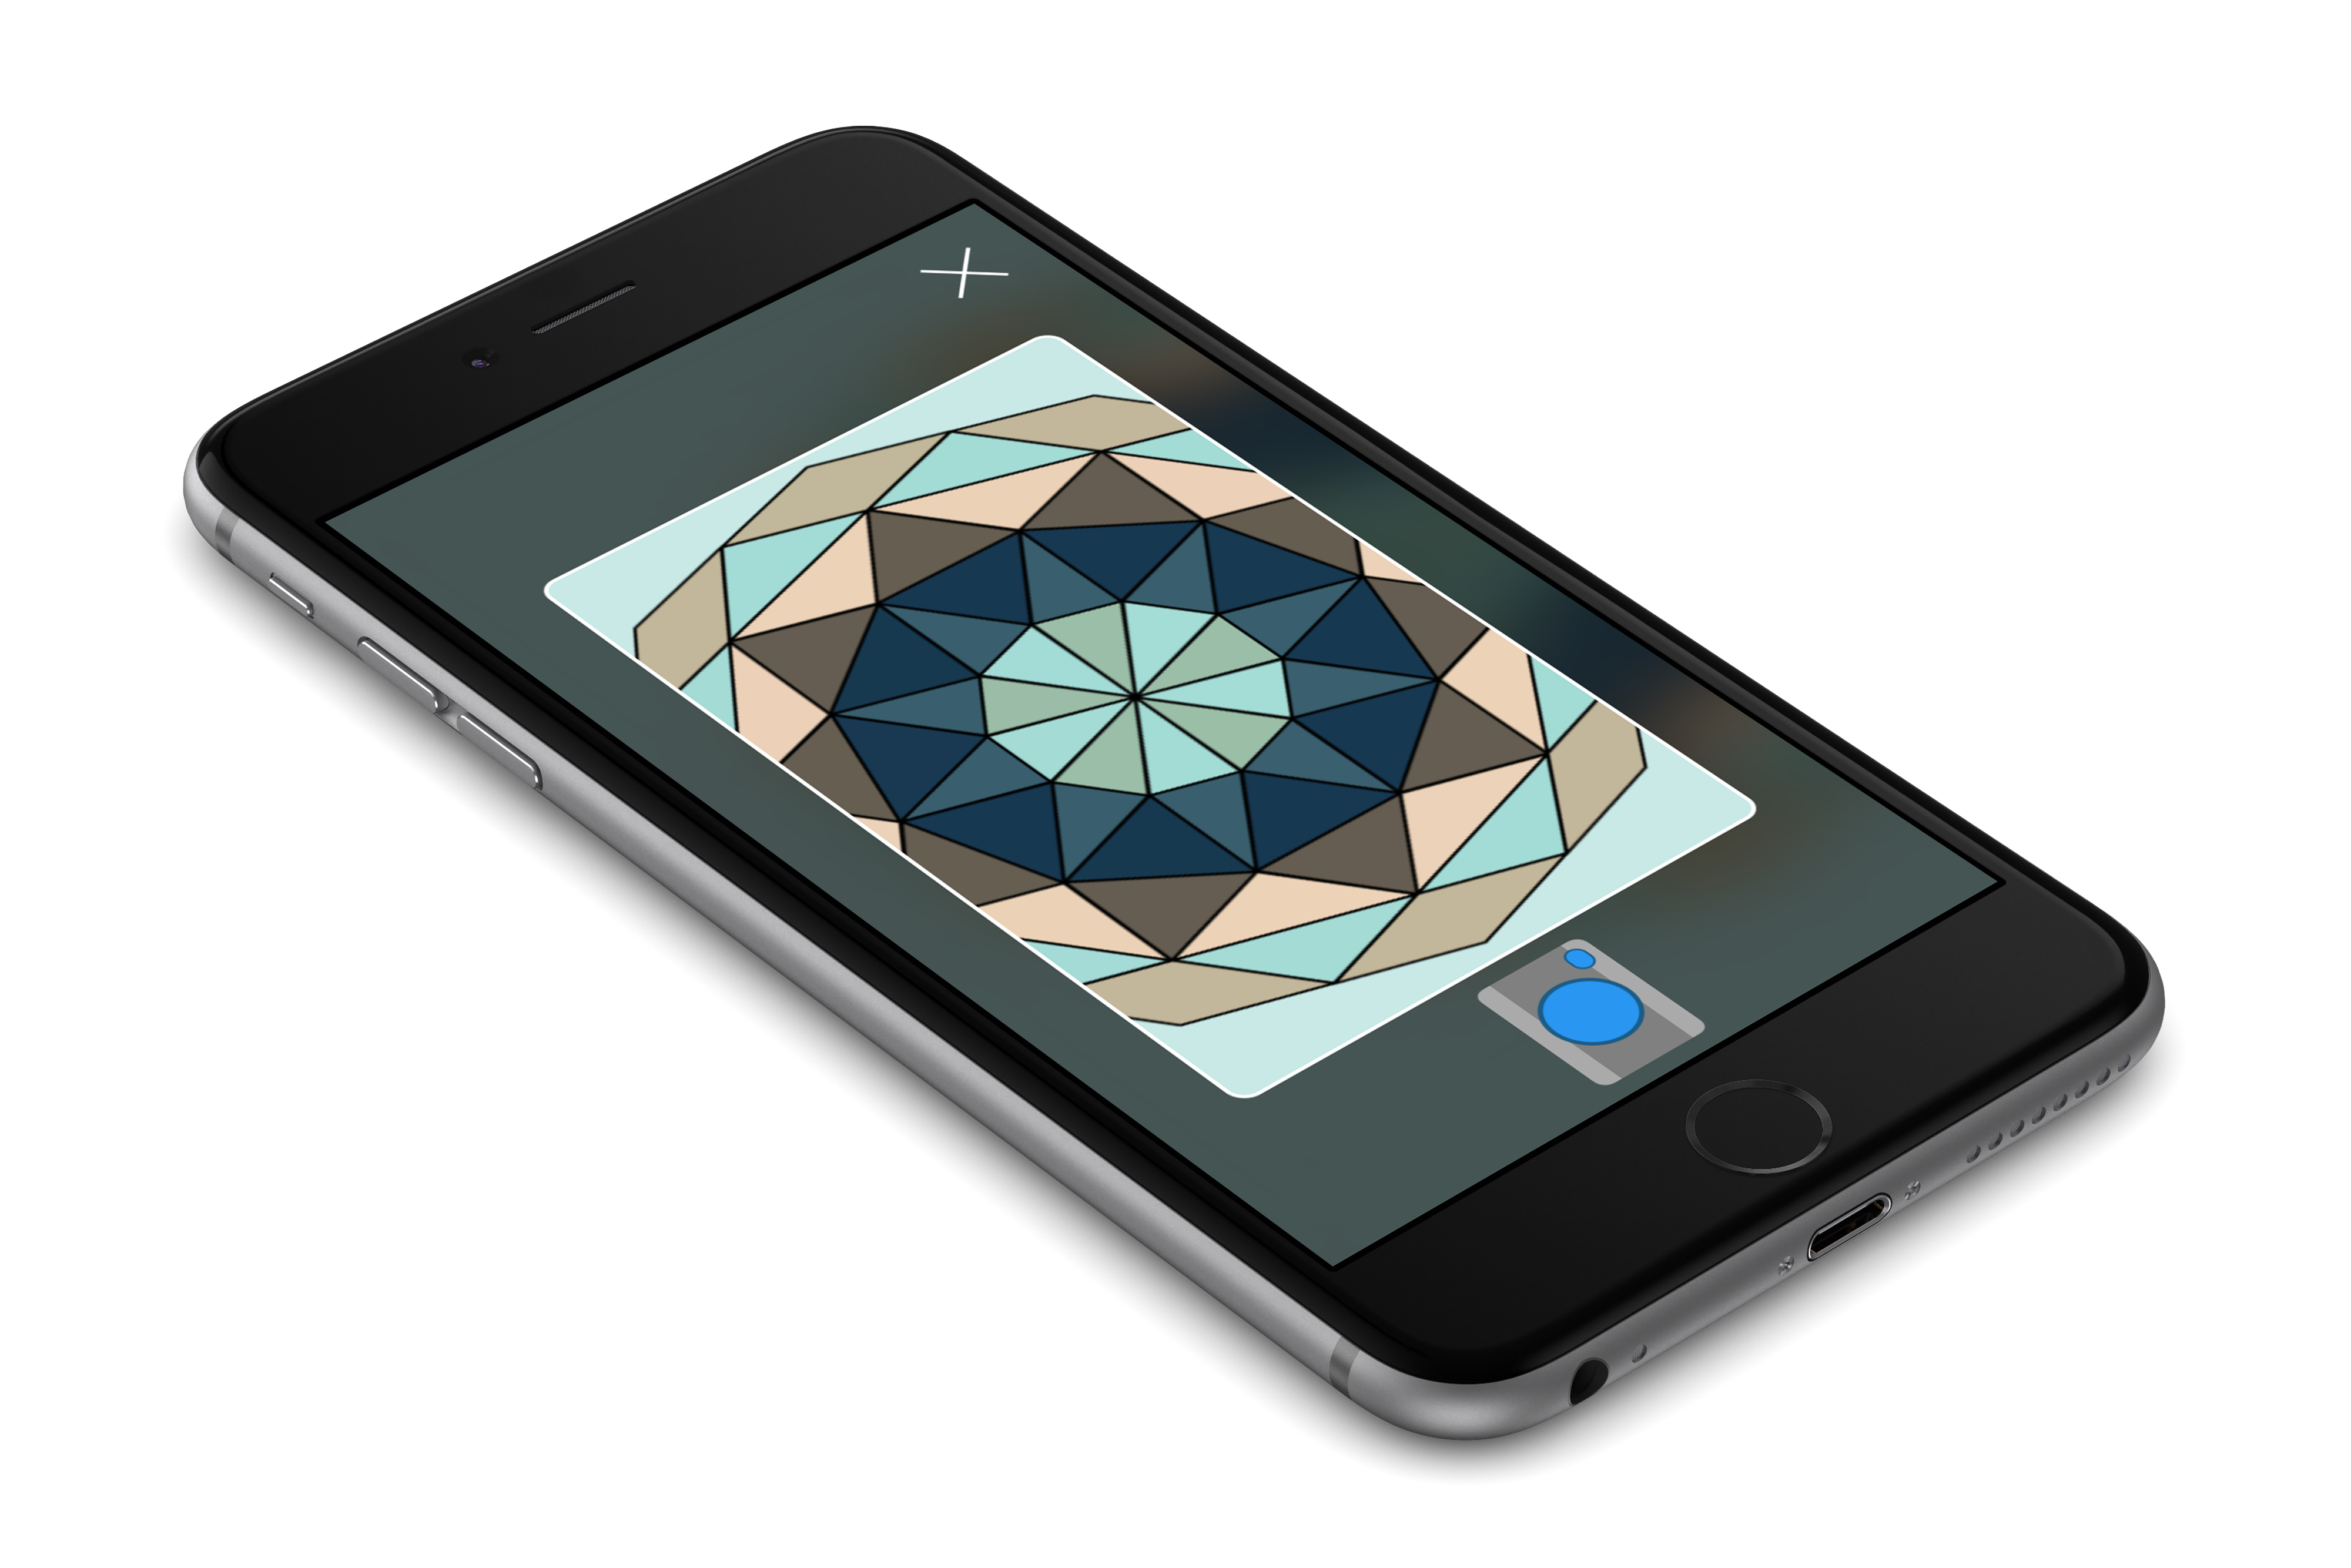
Application allows to take a picture of a card or to select a pic from a library with built-in image picker.
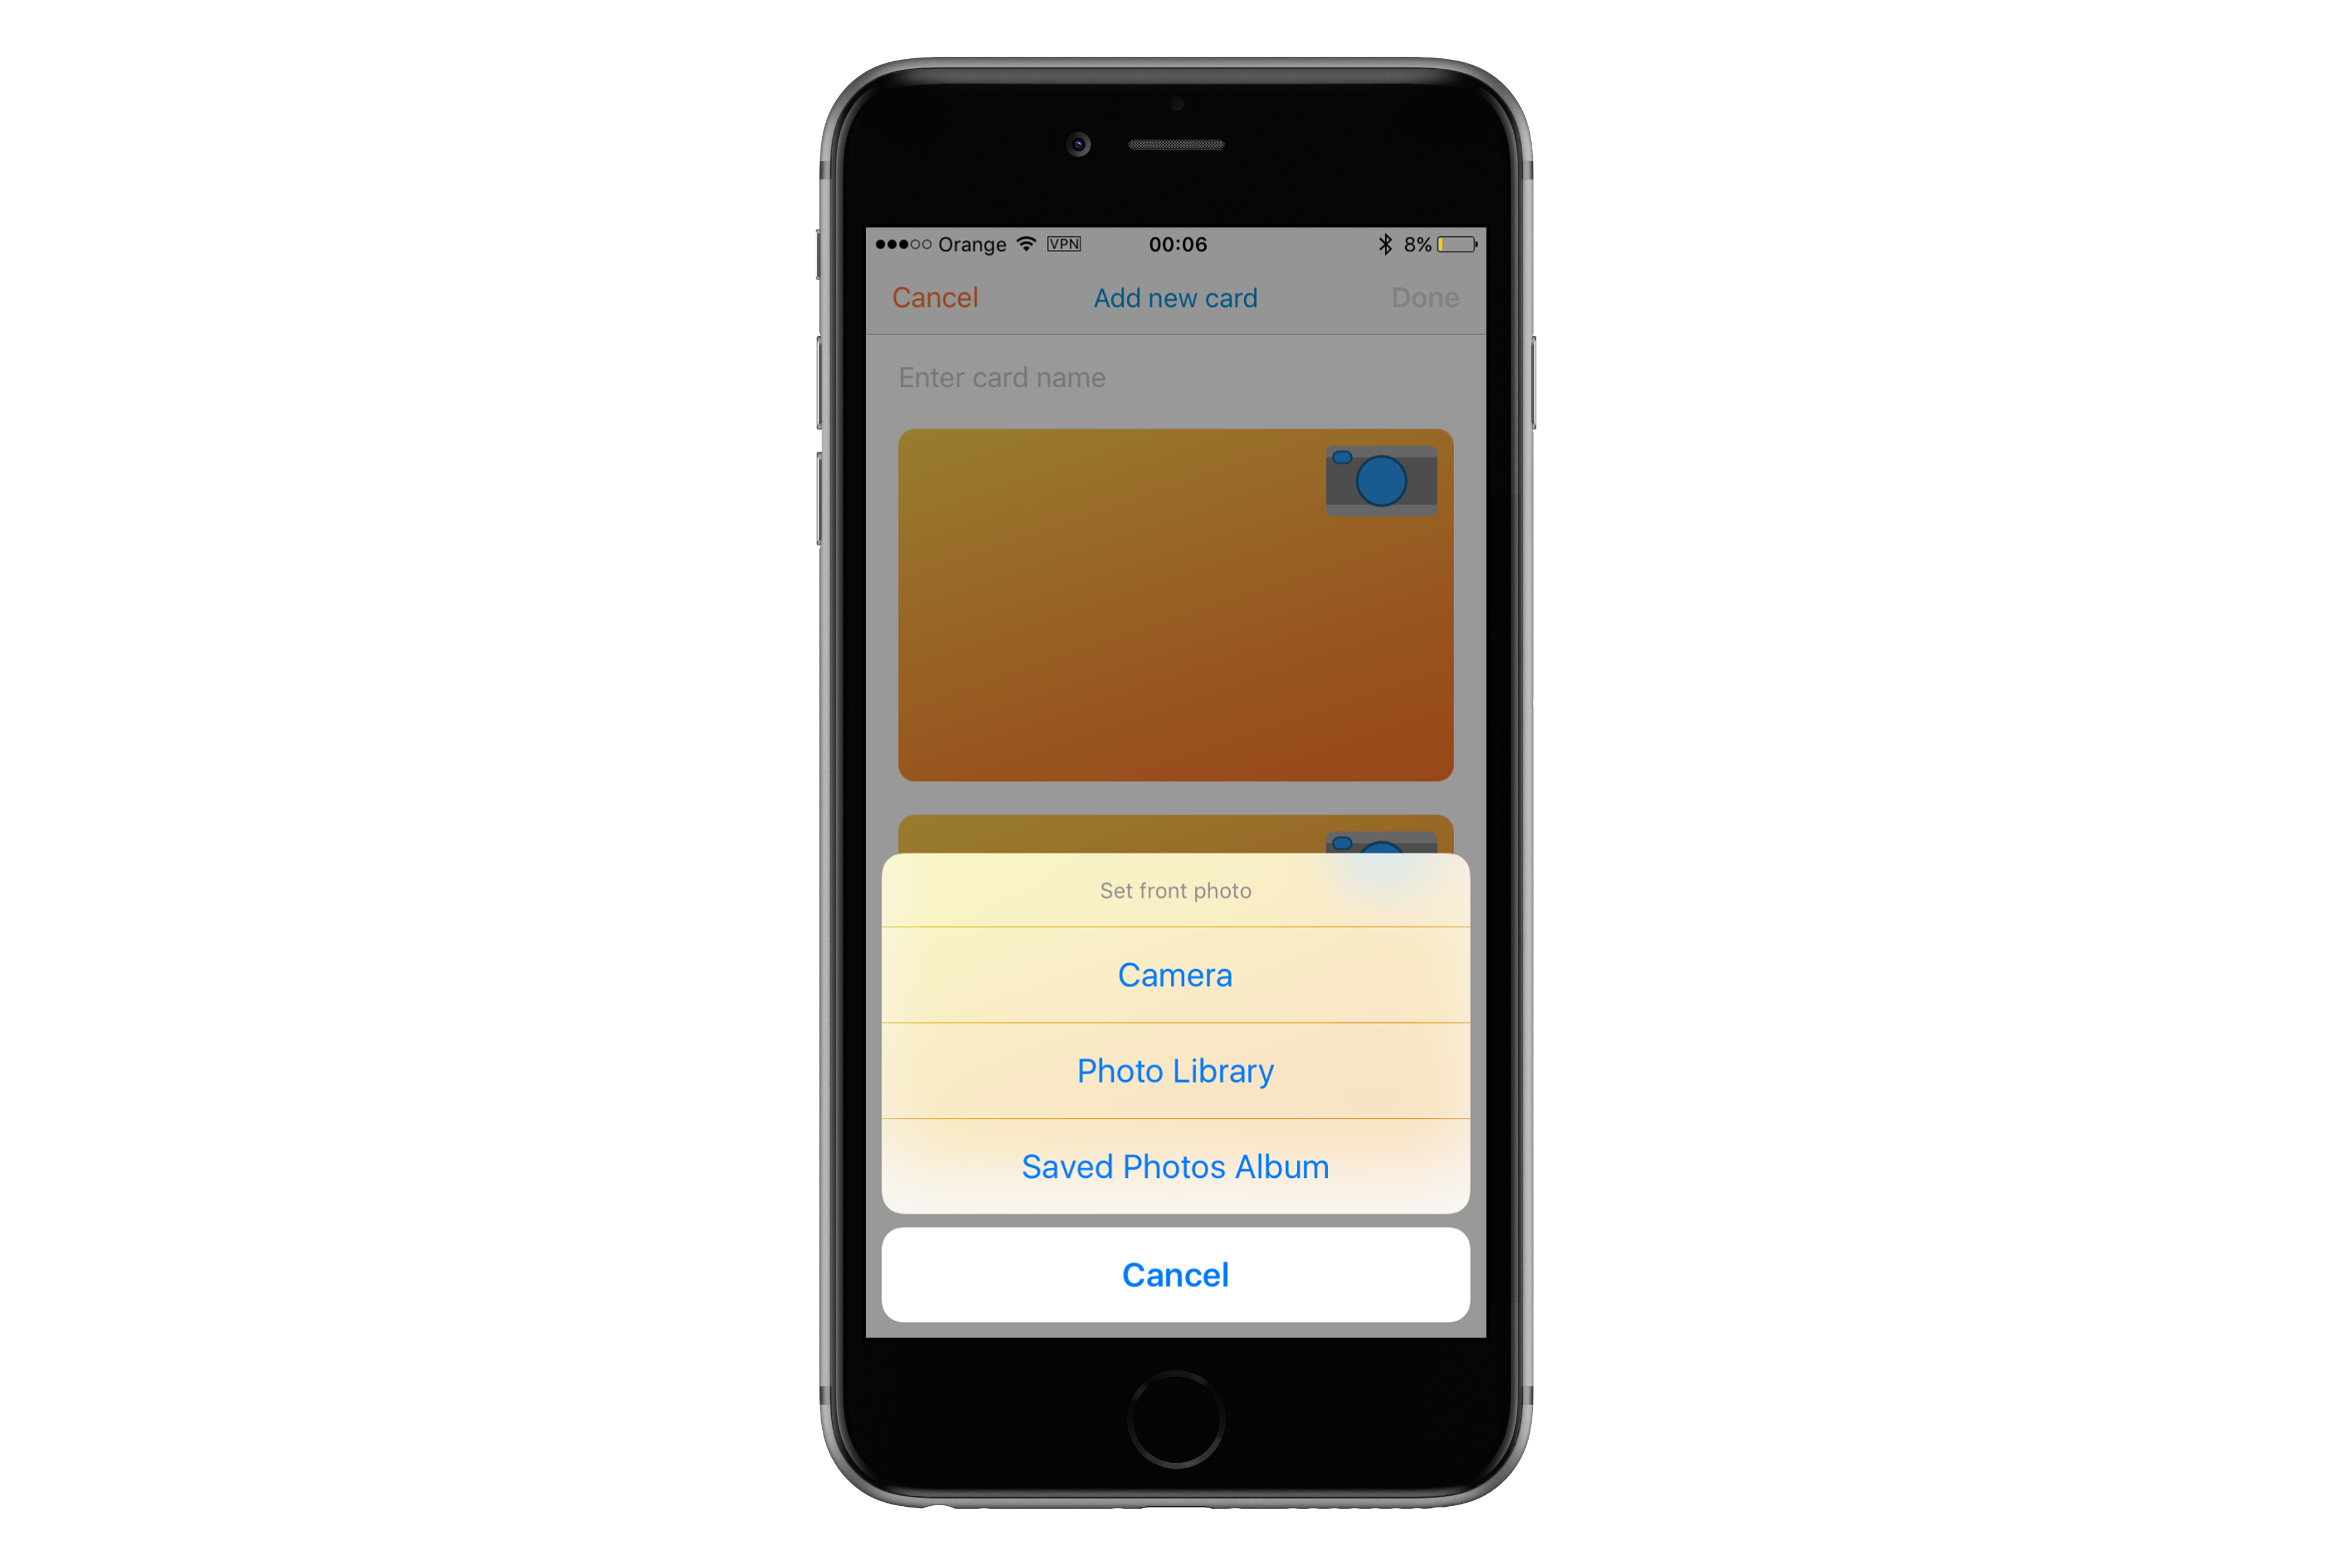
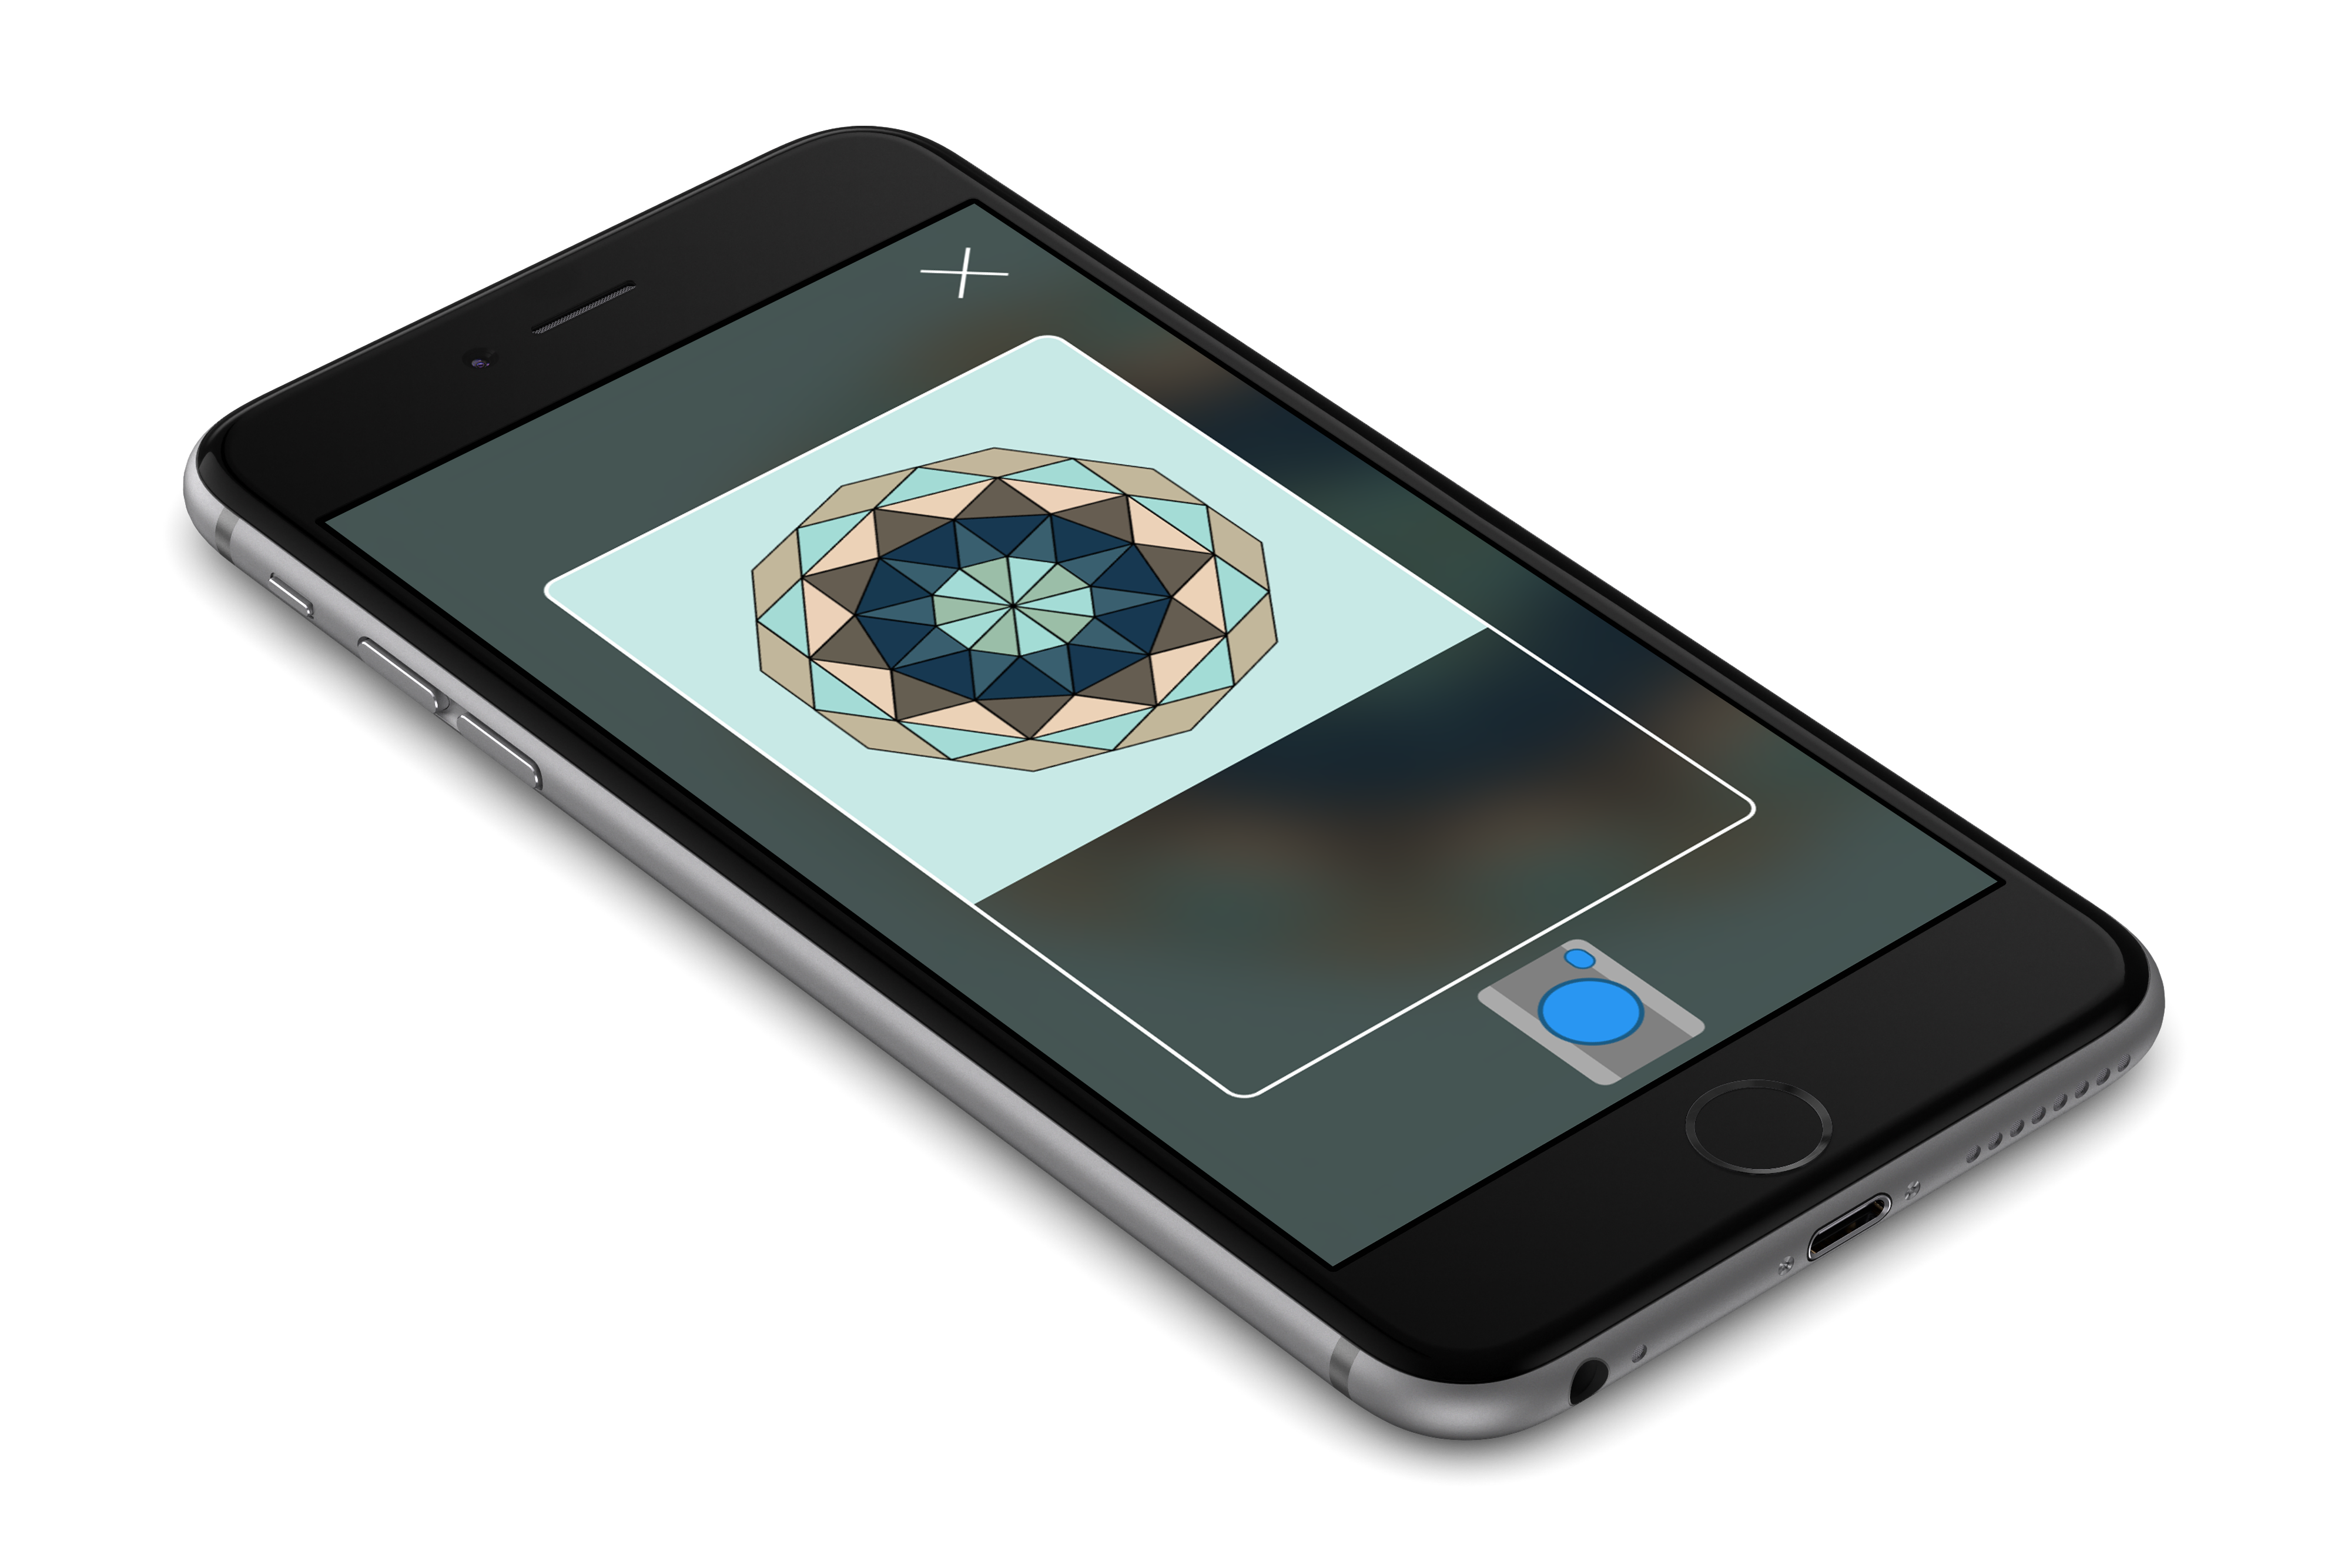
Photo camera shows card outline, so it is easier to take pics. Photos are taken by tapping on a camera button.

If one wants to select a pic from the library, the pic needs to be adjusted to fit card outline.
After filling in all details card can be saved. It is stored locally, but the app tries to send a card to the backend.
And actually that’s it! No more functionalities needed at the moment ;)
MVC
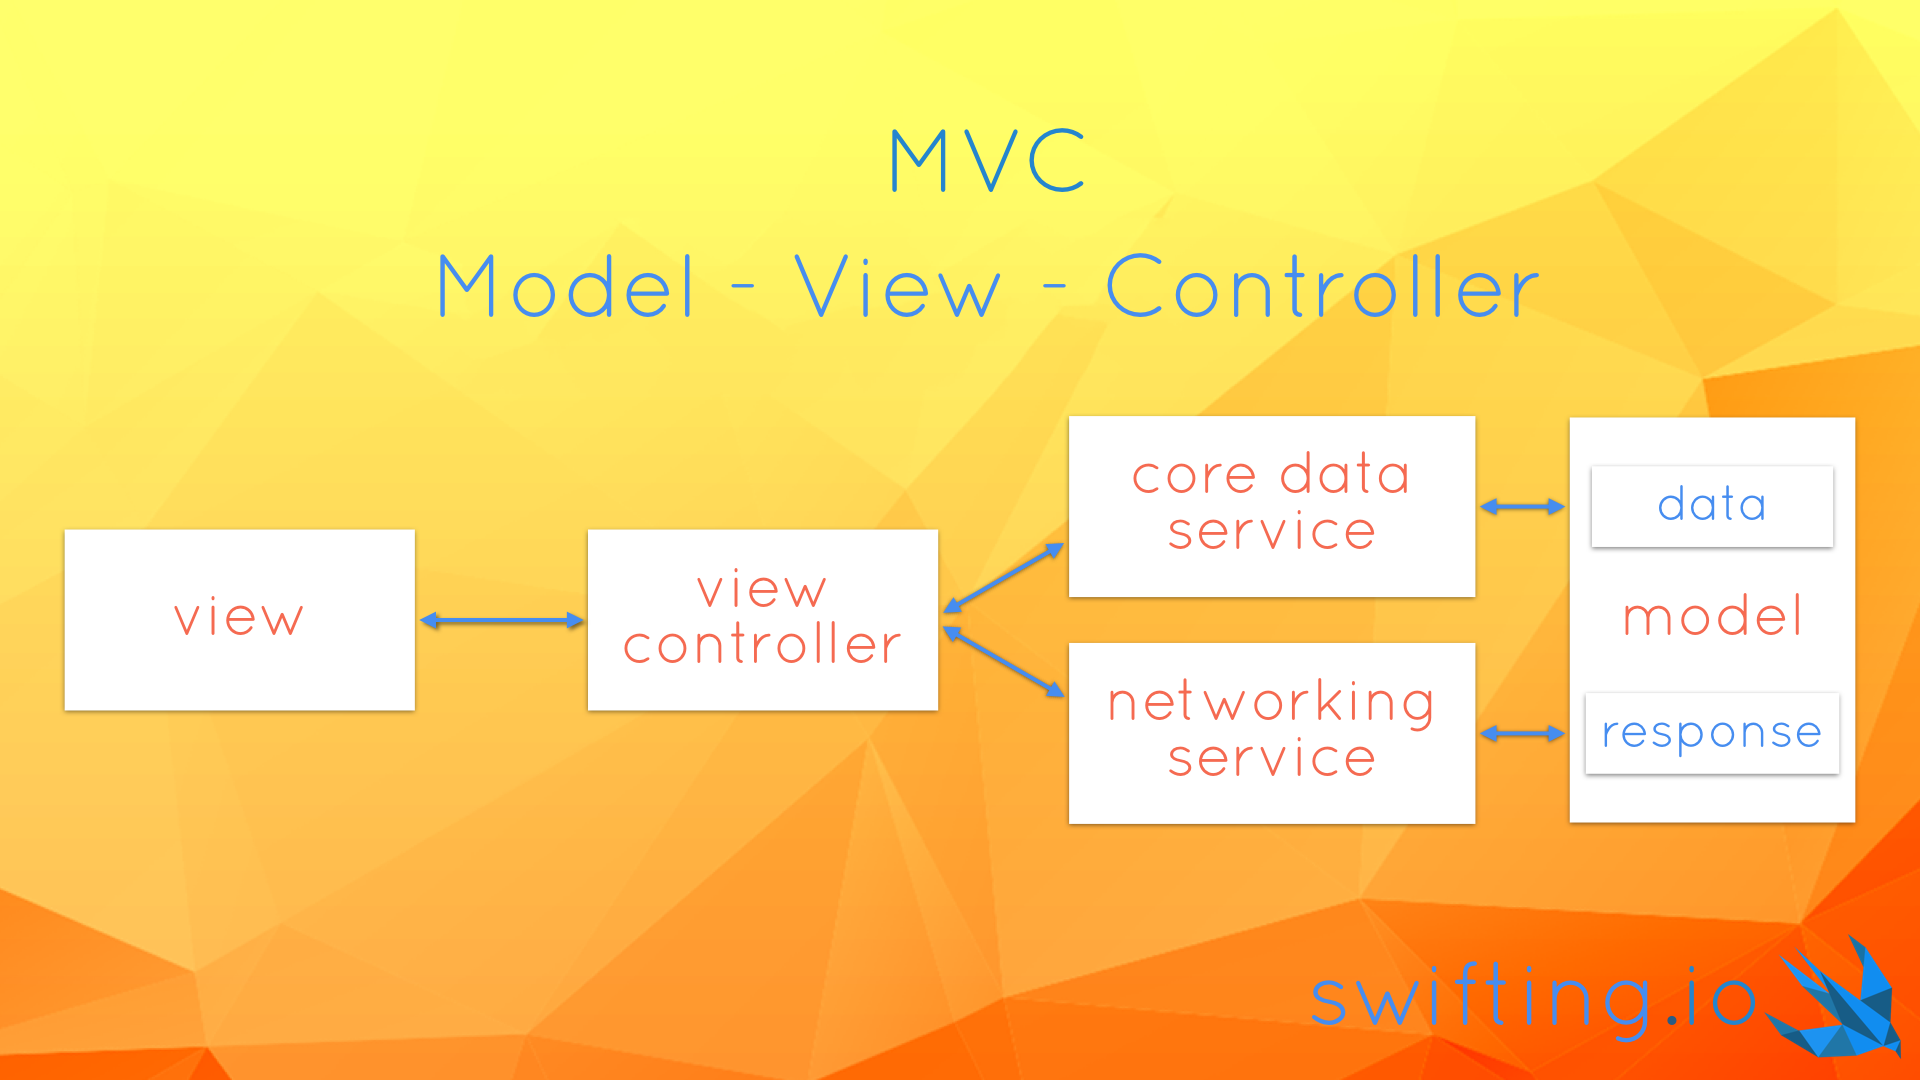
Model - View - Controller architecture is the most common architecture in Cocoa Touch world. The basic concept of it is that an object called Controller responds to events triggered by a View. It can update a Model upon an action, and update the View when the Model changes. A View Controller in Cocoa Touch, deals with animations, data persistence and network calls. Some of the logic can be extracted into separate objects, such as Core Data (Persistence) and Network services, so that an app architecture can look like this:
Let’s have a look on all components in the MyCards app!
View Controllers
Thanks to the following command that I had used in Terminal I was able to extract the number of lines in each file and the total is 2592.
find . "(" -name "*.swift" ")" -print0 | xargs -0 wc -l
Not so bad, after all we used our good friend codebeat and received an A grade. The project consists of a few view controllers:
CardsViewController- downloads data from the Internet, saves it to a persistent store and displays a list of cards from the persistent storeCardDetailsViewController- displays a card details and saves changes to the persistent store and to the Internet. It operates in normal (just display card), edit (modify data), or create (add a new card) modes.CardPhotoViewController- displays card photo in fullscreenPhotoCaptureViewController- takes a photoCropViewController- crops a photo to fit a card outlineImagePickerController- aUIImagePickerControllersubclass used to distinguish side of a card of which photo is being takenHiddenStatusBarViewController- a superclass for view controllers that require status bar to be hidden (i.e. all shown fullscreen for taking a photo, cropping an image or displaying a picture)
Models
A loyalty card in the application is represented by a Card struct.
struct Card {
    let identifier: String
    let name: String
    let front: UIImage?
    let back: UIImage?
}

extension Card {
    var isValid: Bool {
        guard
            let _ = front,
            let _ = back,
            !name.isEmpty,
            !identifier.isEmpty
            else { return false }
        return true
    }
}
The Card contains an identifier, which should be unique. It is useful for backend or persistent store saves. Card also contains a name and optional front and back images. The struct contains an isValid property that validates whether a card can be saved or not. E.g. it used by the CardDetailsViewController to check if data provided by a user is correct and if the controller should proceed with saving it.
A CardMO class is an NSManagedObject subclass that mirrors the Card in the Core Data. The difference between both is that Managed Object of the card stores front and back photos as binary data (NSData).
In the app the user can take or select a photo for the front or the back of a loyalty card. To distinguish for which side user chooses a photo a Card.Side enum is used.
enum Side {
    case front
    case back
}
When displaying details of a loyalty card with CardDetailsViewController one can also edit card information. The view controller knows whether it is in .edit or .normal mode because of a mode property of type CardDetailsViewController.Mode. The view controller is also used for creating a new loyalty card, hence .create mode exists.
enum Mode {
	case normal
	case edit
	case create
}
Views
Among standard UIKit components application UI uses some custom views:
-
TappableView- can be considered an animatable button, with custom subviews added to its content view. A button tap is forwarded to a delegate to act upon. -
CloseButton- is a subclass of theTappableView. Its content view displays anXsign.
PhotoCamera- is a view that shows a photo camera icon. Its view is drawn withUIBezierPaths
PreviewView- consists of aforementionedCloseButton,PhotoCameraand a card outline. It contains also anAVCaptureVideoPreviewLayerto show input from phone’s camera.
If we’re talking about views it’s worth mentioning a few patterns used in the app. First of all, we’re using a Builder protocol to set app all properties on views used in a view controller to display its data. It looks like this:
fileprivate lazy var collectionView: UICollectionView = UICollectionView(frame:
        .zero, collectionViewLayout: self.layout).with {
        $0.dataSource = self
        $0.delegate = self
        $0.backgroundColor = .clear
        $0.register(CardCell.self)
        $0.alpha = 0.0
    }
What it allows us to do is calling with(configure:) method in which we get the instance we can configure. We wanted to extract view configuration from viewDidLoad method to avoid having a massive method and a large ABC metrics in Codebeat. Properties using this pattern are marked as lazy properties. Thanks to that compiler doesn’t complain if we initialize UICollectionView with self.layout property 😉. Btw., if the way we register a cell for reuse seems strange to you, check out our issue #40.
We ❤️ auto layout. Due to that fact, we have a special helper that initializes a view with a .zero frame and sets translatesAutoresizingMaskIntoConstraints to false. You just need to call constrained() method on a UIView subclass in order to tap into it. Unfortunately it won’t work with classes such as UICollectionView or UITableView due to their designated initializers, but you can use the Builder protocol to do it by yourself.
Constraints for a view or for view controller’s views are created in configureConstraints() method. We use anchors API to create NSLayoutConstraint relations between views and we activate them in bulk using a class method.
func configureConstraints() {
	var constraints: [NSLayoutConstraint] = []
	//...
	constraints.append(closeButton.heightAnchor.constraint(equalToConstant: 40))
	constraints.append(closeButton.widthAnchor.constraint(equalToConstant: 40))

	//...
	NSLayoutConstraint.activate(constraints)
}
Services
Additionally, a view controller can be supported by some services:
CoreDataWorkerNetworkLoader
CoreDataWorker
CoreDataWorker is a pattern presented in issue #28 Better CoreData with Swift Generics, which is used for fetching data from and saving data to a persistent store.
NetworkLoader
NetworkLoader - is a class conforming to a set of protocols that enable downloading and uploading data from and to a backend. It is underlaid by an NSURLSession instance.
A NetworkLoader is initialized with an URL to a backend. A shared instance is created in a separate file in an extension, in order to be easily replaced with a new URL.
extension NetworkLoader {
    static let shared: NetworkLoader = NetworkLoader(URL(string: "http://localhost:8000")!)
}
A SimpleHTTPServer in Python is used as a backend for the application. After downloading our project just run this command from ./MyCards/MyCards/ directory:
python -m SimpleHTTPServer 8000
The directory contains the cards.json file which consists of a card data. The data can be converted into model layer by using a Parser.
The NetworkLoader class conforms to a set of protocols that describe interfaces for downloading and uploading data. The ParsedDataDownloading protocol and its download(from: parser:callback:) method uses a Parser to transform a downloaded JSON file into a struct that corresponds to data from the file. The JSONConvertibleDataUploading protocol also uses a JSONDataConverting parser that is able to translate a model type into a valid JSON to be sent to a backend. Both methods expect a service endpoint to be passed as an argument. The endpoint is used to create a URL along with a URL passed to initialize the NetworkLoader.
protocol ParsedDataDownloading {
    func download(from endpoint: String, parser: Parser, callback: @escaping (Any?) -> Void)
}

protocol JSONConvertibleDataUploading {
    func upload(object: Any, to endpoint: String, parser: JSONDataConverting, callback: @escaping (Any?) -> Void)
}
In our project the CardParser class conforms to the Parser protocol and is able to convert the cards.json content into an array of Card instances. It also conforms to the JSONDataConverting protocol to convert an array of Cards back to a JSON.
Taking a photo with AVFoundation
The most unusual part of this application is taking a photo. On iOS you are allowed to use a built in UIImagePickerController to select a picture from the Photo Library, the Saved Photos Album or to capture a photo. Using the UIImagePickerController didn’t let us build a seamless user experience so we decided to built our own PhotoCaptureViewController that uses AVFoundation components. Let’s have a look how to display an input from camera in a view and how to take a picture.
First of all, when view loads, we have to check whether our application is allowed to take pictures/videos. We can do that by calling a method on the AVCaptureDevice class:
AVCaptureDevice.authorizationStatus(forMediaType: AVMediaTypeVideo)
If the method returns .notDetermined value we can request an access with another class method:
AVCaptureDevice.requestAccess(forMediaType: AVMediaTypeVideo) {
	granted in
	// completion
	guard granted else { return }
}
The main object that allows communication with a photo camera is of AVCaptureSession type. In order not to have any delays on the main thread we can use a DispatchQueue to perform tasks related to a session.
fileprivate let session = AVCaptureSession()
fileprivate let queue = DispatchQueue(label: "AV Session Queue", attributes: [], target: nil)
When all views are loaded we can configure a session using the queue. First of all the configuration process consists of checking the authorization status and getting an object representing a back camera (extension on AVCaptureDevice used in the code below). When both conditions are satisfied, we can beginConfiguration() of the session 😉. We can set a quality for the picture by using the sessionPreset property of the session. The AVCaptureSessionPresetPhoto means that we use capture settings suitable for high resolution photo quality output. Then we can try to create an AVCaptureDeviceInput with the back camera and then to add it as an input to the session. We can also add an AVCapturePhotoOutput to the session. Our output is a property on the PhotoCaptureViewController. The output captures in high resolution and does not enable Live Photo.
fileprivate func configureSession() {
	queue.async {
		guard .authorized == authorizationStatus else { return }
		guard let camera: AVCaptureDevice = AVCaptureDevice.backVideoCamera else { return }
		defer { session.commitConfiguration() }

		session.beginConfiguration()
    session.sessionPreset = AVCaptureSessionPresetPhoto

		do {
			let input = try AVCaptureDeviceInput(device: camera)
			guard session.canAddInput(input) else { return }
			session.addInput(input)
		} catch { return }

		guard session.canAddOutput(output) else { return }
		session.addOutput(output)
	}
}
We want to start our session when the view controller’s view appears and stop it when the view disappears. This can be done by calling the startRunning() and stopRunning() methods on the session.
fileprivate func startSession() {
	queue.async {
		guard self.authorizationStatus == .authorized else { return }
		guard !self.session.isRunning else { return }
    self.session.startRunning()
	}
}

fileprivate func stopSession() {
	queue.async {
		guard self.authorizationStatus == .authorized else { return }
		guard self.session.isRunning else { return }
		self.session.stopRunning()
	}
}
Once we know how to setup and start/stop a session, let’s have a look on how to take a photo 📸. In our view controller the takePhoto() method is used for that purpose. Once again job is executed on the queue created for session-related tasks. Taking a photo is done by calling the capturePhoto(with:, delegate:) method on the output. The first argument of the method is an object representing settings for the photo. In our case those are set to auto-flash mode and high-res picture.
fileprivate func takePhoto() {
	queue.async { [unowned self] in
		let photoSettings = AVCapturePhotoSettings()
		photoSettings.flashMode = .auto
		photoSettings.isHighResolutionPhotoEnabled = true
		self.output.capturePhoto(with: photoSettings, delegate: self)
	}
}
When a photo is taken a AVCapturePhotoCaptureDelegate’s method gets called. It has a long name you can lookup below, I won’t dare repeating it in the text 😉. From a photoSampleBuffer that is provided as an argument we try to create a JPEG photo. Things wouldn’t be interesting if we didn’t have to play with the photo. Our interface displays a card outline that a user can use to center a card in this rounded rectangle. We have to process and crop the photo based on that. This is what the process(_:) method actually does. If we are successful with processing the photo, the method returns a UIImage we can further use in our app.
func capture(_ captureOutput: AVCapturePhotoOutput,
						 didFinishProcessingPhotoSampleBuffer photoSampleBuffer: CMSampleBuffer?,
						 previewPhotoSampleBuffer: CMSampleBuffer?,
						 resolvedSettings: AVCaptureResolvedPhotoSettings,
						 bracketSettings: AVCaptureBracketedStillImageSettings?,
						 error: NSError?) {

	guard let sample = photoSampleBuffer,
			  let data = AVCapturePhotoOutput.jpegPhotoDataRepresentation(
				  forJPEGSampleBuffer: sample,
				  previewPhotoSampleBuffer: previewPhotoSampleBuffer),
        let photo = process(data)
	else { print("Error capturing photo: \(error)"); return }
	//Do something with the photo
}
And actually that’s all it takes to take a basic photo with AVFoundation!
Summary
We hope you are enjoying our app. We strongly encourage you to dive into the whole project and point out improvements for our implementation. As mentioned at the beginning, we wanted to build a non-trivial application that will be the foundation for porting the source code from a standard MVC architecture to MVVM, VIPER and VIP architectures. In the last section you can find links to articles describing some patterns we used in the project. Stay tuned, architecture wars are not over!
May the force be with you!