#4 Migration from Parse to Heroku
In this tutorial I will show how to migrate our iOS Parse application to Heroku step by step:
- In the first step we will migrate Parse DB to Self-Hosted MongoDB
- then we will set up Local Parse Server
- and finally we’ll deploy Parse Server to Heroku
During creating this post I mainly based on Parse Server Guide, where you can find more general information about migration.
But before we get started…
First let’s setup MongoDB on MongoLab. This is the easiest way to migrate our data from Parse, alternative way is to set up mongoDB locally, but in this tutorial I have decided to show everything based on MongoLab.
Set up database on MongoLab
Go to MongoLab, if you don’t have account yet, create one and then choose 500 MB(for free):

Important: Don’t forget to add a new user to your database:)
set configuration for database according to requirements which you can find on Parse Guide website:
- MongoDB version 2.6.X or 3.0.X - necessary
- The failIndexKeyTooLong parameter must be set to false. - necessary
- An SSL connection is recommended (but not required). - optional
- We strongly recommend that your MongoDB servers be hosted in the US-East region for minimal latency. - optional
Install mongo locally:
brew install mongodb
I tried to set failIndexKeyTooLong parameter via:
db.runCommand( { setParameter: 1, failIndexKeyTooLong: false } )
an then in console appeared:
{
	"ok" : 0,
	"errmsg" : "setParameter may only be run against the admin database.",
	"code" : 13
}
it means that you only can modify parameters when you have admin privileges, but I neither couldn’t login with admin privileges nor create user with root role (maybe I miss something). For sure it is possible if your database is set up locally. It will be great to hear your experience with databases!:)
Anyway, a very nice tool to manage tou mongoDB database you can download from here:)
Information how to make SSL connection you can find here.
After setting up database we are ready to:
Migrate Parse DB to Self-Hosted MongoDB
Login to your Parse account and select your app, then go to: App Settings → General → Migrate to external database:
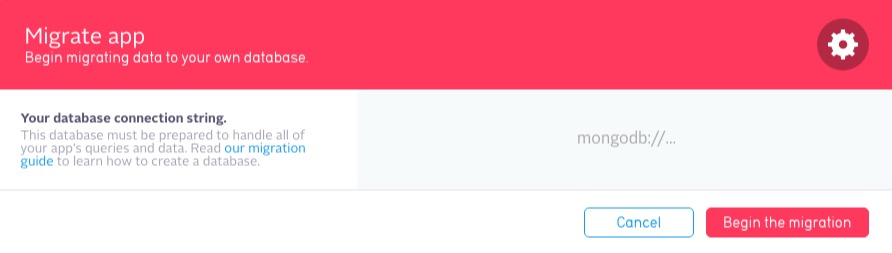
then in text field enter your databaseURI which you achieved after setting up database on MongoLab:
mongodb://dbuser:dbpassword@ds033484.mongolab.com:33484/new_bw_database
then after pressing Begin the migration button, process should start:
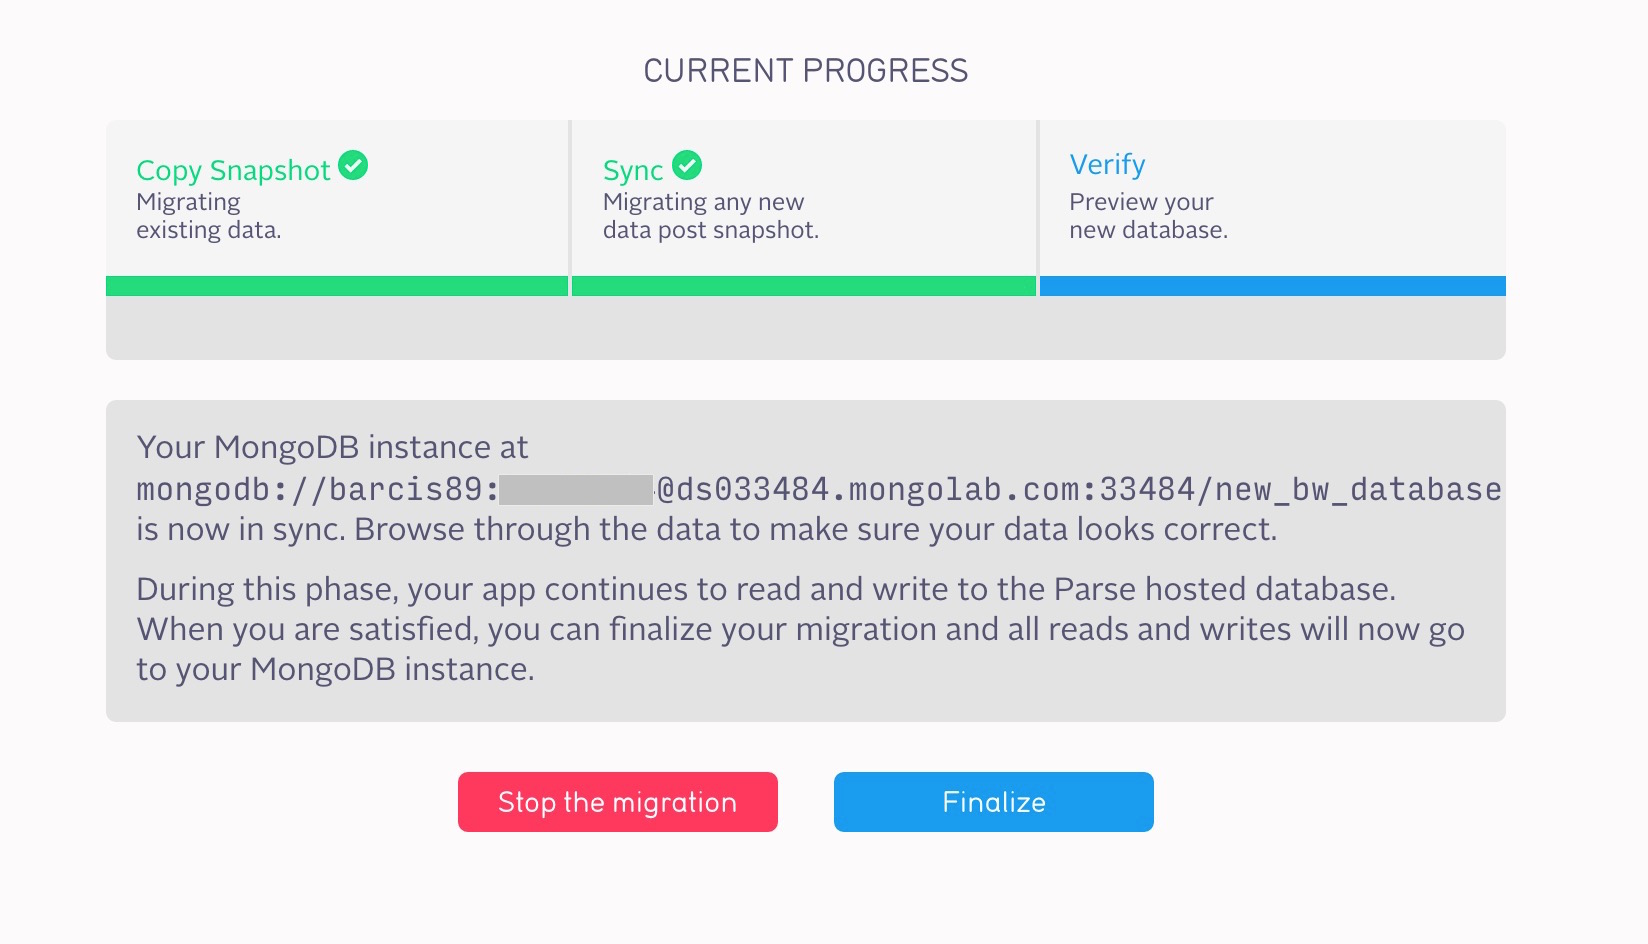
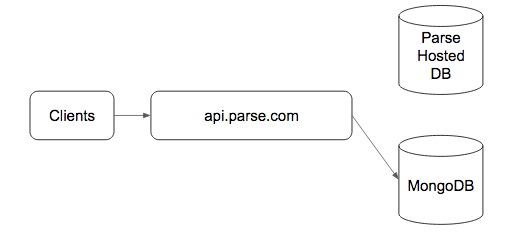
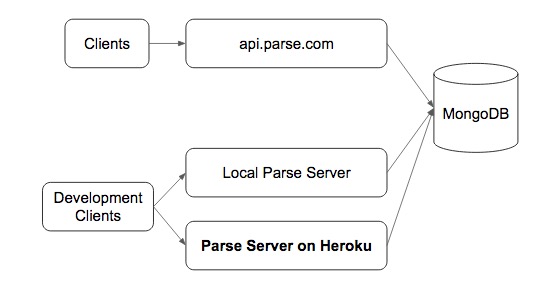
In this stage your app is still hitting api.parse.com, but is using your MongoDB instance. Now you are responsible for your own imports, exports, backups, indexes, monitoring, and other database administration.
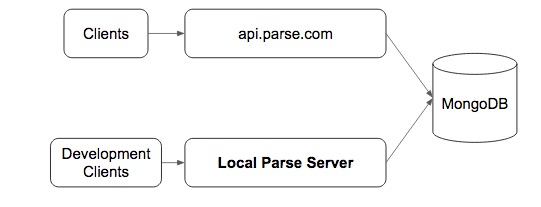
Set Up Local Parse Server
In this step we will go one step further, and we will setup Parse Server locally:
Prerequirements before we start next step:
Make sure that you have Node and Express, if not, then in console type:
brew install node
npm install express
if you upgraded/updated npm version, it could be helpful to rebuild everything by typing:
npm rebuild
If you want to remove node and install everything from zero this Gist can help you.
ok, now we can start setting up local server:
Install Parse Server:
npm install parse-server
Create .js file and add the following code:
var express = require('express');
var ParseServer = require('parse-server').ParseServer;

var app = express();
var api = new ParseServer({
  databaseURI: 'mongodb://your.mongo.uri',
  cloud: './cloud/main.js',
  appId: 'myAppId',
  fileKey: 'myFileKey',
  masterKey: 'mySecretMasterKey',
  clientKey: 'myClientKey',
  restAPIKey: 'myRESTAPIKey',
  javascriptKey: 'myJavascriptKey',
  dotNetKey: 'myDotNetKey',
});

// Serve the Parse API at /parse URL prefix
app.use('/parse', api);

var port = 1337;
app.listen(port, function() {
  console.log('parse-server-example running on port ' + port + '.');
});
of course don’t forget to copy your appID, masterKey from your Parse account (Security & Keys Tab) and databaseURI from your MongoLab website.
Run app:
$ node app.js
and now you should have local server on your host: http://localhost:1337/
Now if you would open this site in browser you could get response from server:
{"error":"unauthorized"}
The reason is simple: we can’t forget to send our request with necessary parameters as in example below:
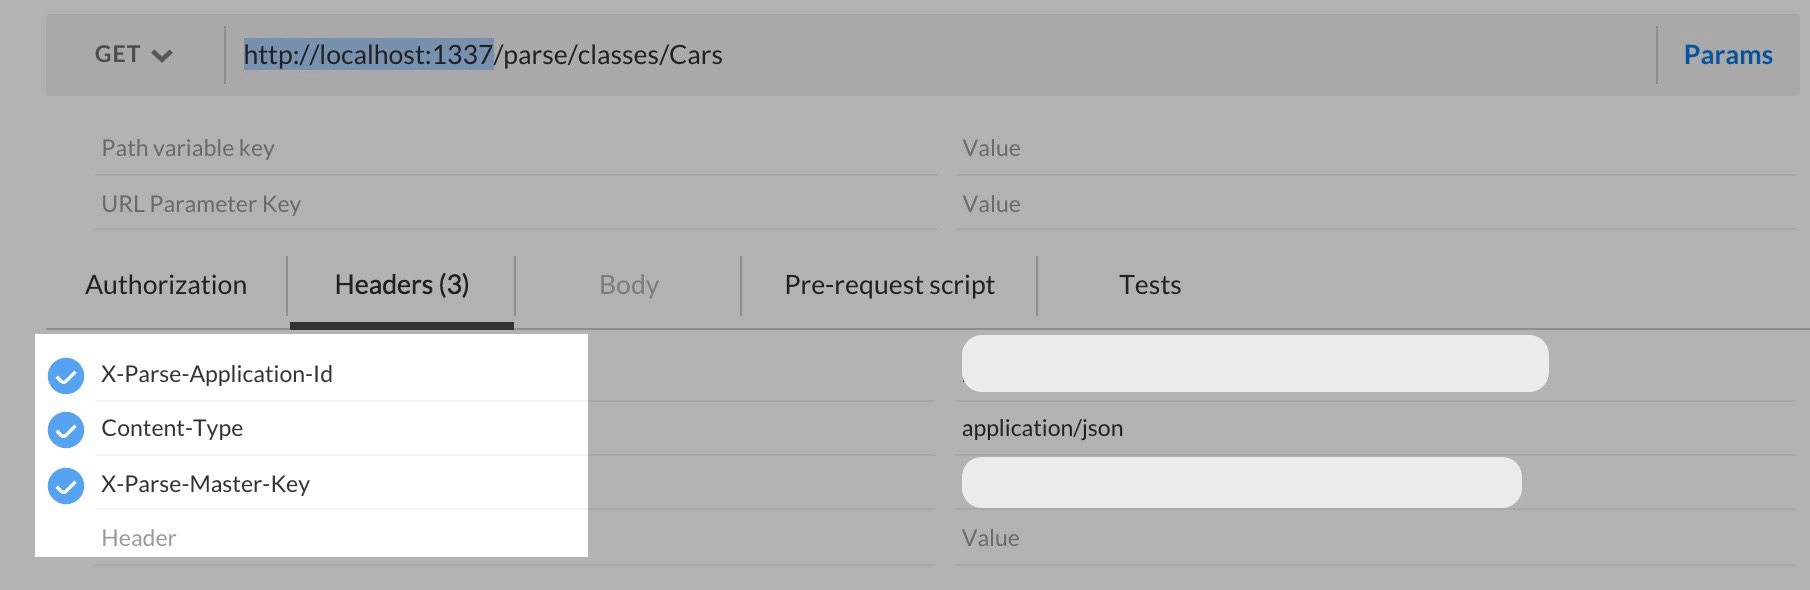
or just type in console:
curl -X GET \
  -H "X-Parse-Application-Id: YOUR_APP_ID" \
  -H "X-Parse-Master-Key: YOUR_APP_MASTER_KEY" \
  http://localhost:1337/parse/classes/Cars?utm_source=swifting.io&utm_medium=web&utm_campaign=blog%20post
everything should work (i hope so:) ). If yes then in response we should see our requested entities.
{
  "results": [
    {
      "objectId": "5wez6D7TIc",
      "createdAt": "2016-02-06T16:57:14.534Z",
      "updatedAt": "2016-02-06T16:57:53.009Z",
      "carName": "Fiat 126 p"
    },
    {
      "objectId": "dAZtEElbdg",
      "createdAt": "2016-02-06T16:57:39.365Z",
      "updatedAt": "2016-02-06T16:57:43.334Z",
      "carName": "Citroen"
    }
    ...
  ]
}
our next big and final step is to…
Deploy Parse Server to Heroku
Prerequirements:
-
First of all create account on Heroku if you don’t have it yet.
-
Install the Heroku Toolbelt it is CLI tool for creating and managing Heroku apps. Once installed, you can use the heroku command from your command shell:
heroku login
Enter your Heroku credentials.
Email: test@example.com
Password:
...
Create a Express application:
Basing on the project from Github I have created a similar, simplified one. Project uses the parse-server module on Express. You can download it from here.
After downloading open index.js and set necessary values for following keys:
- databaseURI
- appId
- masterKey
Deploy application to Heroku:
Locate your project directory in console and then type:
$ cd my-project/
heroku create appName  //in my case: heroku create bwparseserver
Above command prepares Heroku to receive your source code, and additionally a git remote (called heroku) is also created and associated with your local git repository.
Then to connect with self generating git we have to just type:
$ git init
$ heroku git:remote -a appName
Finally commit your code to the repository and deploy it to Heroku:
$ git add .
$ git commit -am "Super Commit"
$ git push heroku master
and we should get endpoint to our service:
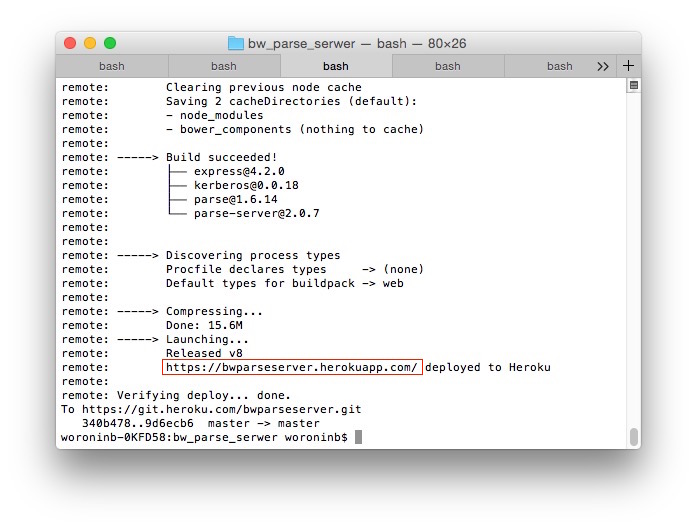
but before we test connection, we should also:
Add mongolab addon:
$ heroku addons:create mongolab:sandbox
here you can get some information like: “Please verify your account to install this add-on plan (please enter a credit card) For more information, see https://devcenter.heroku.com/categories/billing Verify now at https://heroku.com/verify”
This means that even we use free addons we have to connect our account to our credit or debit card, we can do this on billings section after logging in on heroku webpage.
We are at home!!!
Now our service should be available on new URL:
https://appName.herokuapp.com/parse/classes/Cars
Test your remote Parse Server with iOS application
Firstly to didFinishLaunchingWithOptions with AppDelegate.swift copy following code:
Parse.enableLocalDatastore()
let configuration = ParseClientConfiguration { (configuration) -> Void in

       configuration.applicationId = "h..."
       configuration.clientKey = "e..."
       configuration.server = "https://appName.herokuapp.com/parse"
 }

 Parse.initializeWithConfiguration(configuration)
then for example to viewDidLoad() copy and paste following code:
let carObject = PFObject(className: "Car")
carObject["carName"] = "Subaru"
carObject.saveInBackgroundWithBlock { (success: Bool, error: NSError?) -> Void in
     print("Object has been saved.")
}
if in console you got this error:
“[Error]: The resource could not be loaded because the App Transport Security policy requires the use of a secure connection. (Code: 100, Version: 1.12.0)”
The recipe for resolving this issue you can find here.
If everything works, then we should just see: “Object has been saved” in Xcode console.
Voilà!!! :)
Sumarizing
After Migration everything should be transparent to our iOS application:)
When I have finished writing this post I have also discovered different tutorial on the same subject: Guide: How To Migrate Your Parse App To Parse Server With Heroku And MongoLab which is much more detailed. If you are looking for more information about migration I think it can be really helpfull!:)
It would be great yo hear your opinion and your preferences on how you deal with migration prase:)
Have a nice day!:)